

Think planks are just for gym bros? Think again.
A solid plank builds real core strength that helps your posture, protects your low back, and makes everyday tasks easier.
This post walks you through safe setup, common mistakes to fix, and beginner-friendly modifications, from wall planks to knee and forearm versions, so you can hold good form before chasing time.
Read on to learn step-by-step cues and a simple progression that keeps you steady, pain-free, and getting stronger every week.
Comprehensive Beginner Plank Setup and Form Guide

Get on your hands and knees, on a mat or stable floor. Wrists go directly under your shoulders. Knees under your hips. Step one leg back, heel pressing down. Then the other. Now you’re balanced on your toes and hands. Pull your belly button toward your spine, squeeze your glutes, keep everything in one straight line from head to heels. Eyes should land a few inches in front of your hands so your neck stays neutral. Breathe steady. In through your nose, out through your mouth. Hold.
Beginner setup steps:
- Start on all fours, hands flat, fingers spread.
- Wrists under shoulders, knees under hips.
- Step your legs back one at a time, pressing through your heels.
- Pull your shoulder blades gently down and back.
- Draw your navel in, squeeze your glutes to protect your lower back.
- Keep your head aligned with your spine, looking slightly ahead of your hands.
Planks teach your core to stabilize your spine during real movement. Better posture, safer lifting, less strain on your back when you’re hauling groceries or holding a toddler. When you practice planks consistently, you’re building the deep strength that supports everything else you do.
Beginners should hold a plank for 10 to 20 seconds with perfect form before worrying about longer holds. If you can manage 30 seconds of clean form, take 30 seconds of rest, then repeat. If your hips sag or your shoulders creep up before 10 seconds, stop and reset. The goal is practicing the right shape, not just surviving the timer.
Your body should form one straight line. No arched back, no sagging hips, no tension in your neck. If you can’t feel your core working, check your alignment: hips under shoulders, glutes tight, abs pulled in. That controlled tension is where the real work happens.
Muscle Groups Worked During Beginner Plank Training

When you hold a plank, your rectus abdominis and your obliques fire to keep your torso stable. But deeper muscles do just as much work. Your transverse abdominis wraps around your middle like a natural weightlifting belt. Your pelvic floor and diaphragm support breathing and core pressure. Your shoulder girdle holds your upper body in position. All of this happens at once, which is why even a short plank can feel demanding.
Your glutes, thighs, and back muscles also join in. Glutes and quads keep your legs straight and aligned. The muscles along your spine, lats, traps, and rhomboids stabilize your torso from behind. Together, these muscle groups turn a simple static hold into a full-body exercise that trains strength, endurance, and coordination in one move.
Beginner-Friendly Plank Variations to Build Confidence
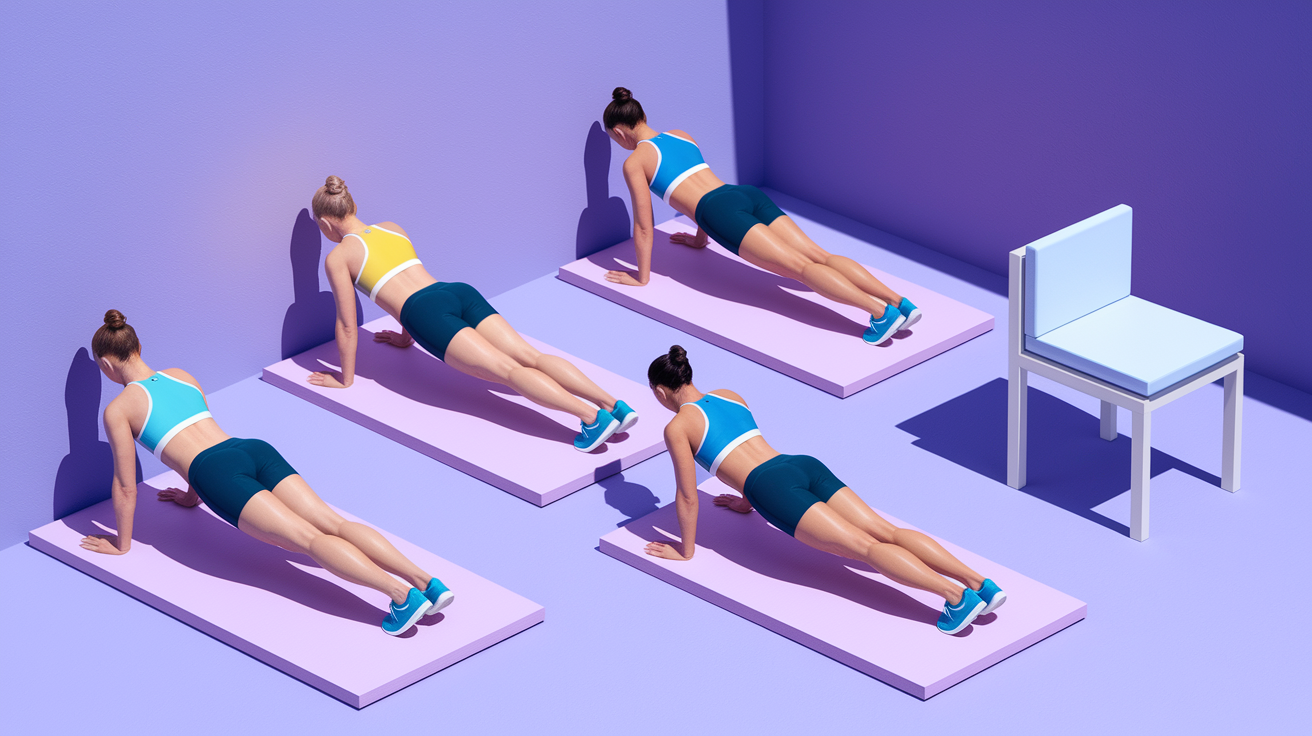
Regressions let you practice the plank shape with less load, so you can nail your form before adding intensity. Beginners who jump straight to the floor often struggle with alignment or can’t hold long enough to learn what proper core engagement feels like. Using an easier variation gives your muscles time to adapt and your brain time to map the movement.
Start with the easiest version that lets you hold good form for at least 15 seconds. If you have shoulder, wrist, or joint concerns, wall and counter planks are your best starting point. If getting down to the floor feels risky or difficult, stick with elevated variations until your strength improves. Once you can hold a wall plank cleanly for over a minute, try the next level.
Accessible plank variations for beginners:
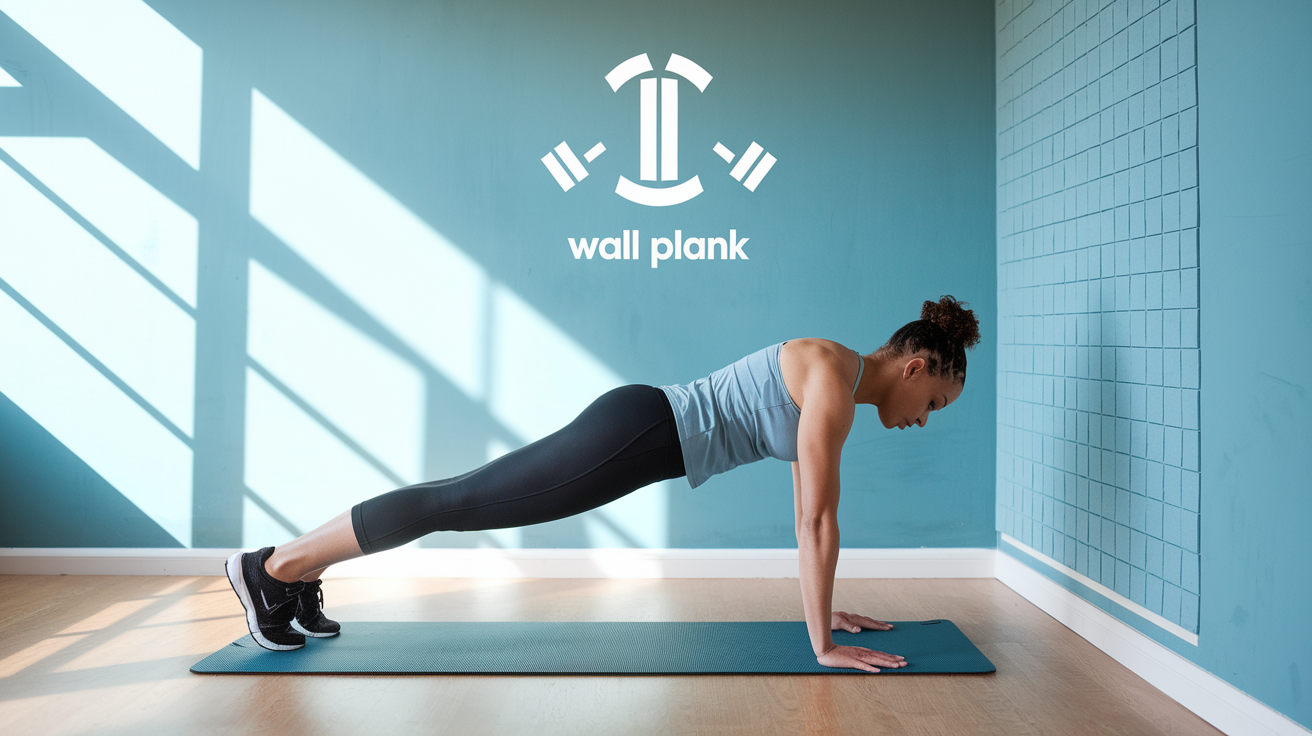
Wall plank: Stand about 3 to 4 feet from a wall, place your palms flat at shoulder height, walk your feet back until your body forms a straight line. Great for anyone with shoulder or wrist issues.
Counter plank: Use a kitchen counter or sturdy desk edge, hands shoulder-width apart, feet stepped back. Less shoulder load than the floor.
Chair or bench plank: Place your hands on a sturdy chair (push it against a wall so it won’t slide), extend your legs back. More challenging than wall or counter but easier than the floor.
Knee plank: Drop your knees to the ground and keep your body straight from shoulders to knees. Reduces the load by about half.
Forearm plank: Rest on your forearms instead of your hands to reduce wrist strain. Elbows stack under your shoulders, same straight-line body shape.
Always check that chairs, benches, or counters are stable before you put weight on them. A wobbly surface turns a safe exercise into a fall risk.
Step-by-Step Instructions for Four Effective Plank Exercises

Basic Plank
This is your foundation plank on hands. The top of a pushup position, held still. You’ve already learned the setup, so now you’re using it as a timed hold to build endurance and full-body tension.
- Set up in the starting position: hands under shoulders, legs extended, body straight.
- Press your palms firmly into the floor and engage your core, glutes, and legs.
- Keep your gaze a few inches in front of your hands to maintain a neutral neck.
- Hold for 10 to 30 seconds, breathing steadily, then lower your knees to rest.
Hip Raises Plank
Hip raises add movement to a forearm plank, teaching your core to stay engaged while your hips shift. This variation builds control and preps you for more dynamic plank work.
- Start in a forearm plank: elbows under shoulders, body in a straight line.
- Lift your hips up and back into an inverted V shape, pressing through your forearms.
- Lower your hips back to the starting plank position with control.
- Repeat for 30 seconds, keeping your core tight the entire time, then rest.
Decline Forearm Plank
This advanced variation places your feet on an unstable surface (a Bosu ball) so your core and glutes work harder to keep you steady. Only try this once you can hold a solid forearm plank on the floor for at least 45 seconds.
- Set up in a forearm plank with your elbows on the floor and hands in fists.
- Place both feet together on the dome of a Bosu ball.
- Tighten your core and glutes to maintain a straight line from head to heels.
- Hold for 20 to 30 seconds, breathing steadily, then carefully step off the ball.
Single-Arm Plank
Lifting one hand removes a point of contact, forcing your core and opposite shoulder to work harder. This is another progression. Master the basic plank first.
- Start in a pushup position with your hands under your shoulders and feet slightly wider than shoulder-width.
- Press firmly into the floor with your left hand and lift your right hand to your hip.
- Engage your thighs, glutes, and core to resist rotation and keep your hips level.
- Hold for 10 to 20 seconds, lower your hand, then repeat on the other side.
Common Beginner Plank Mistakes and How to Fix Them

Most beginner plank problems come from alignment issues or trying to hold too long before form is dialed in. When your body gets tired, compensation patterns kick in. Hips sag, shoulders creep up, or your back arches. Catching these early and resetting saves you from wasted reps and potential strain.
If you feel tension in your lower back instead of your abs, your form has broken down. Stop, realign your hips under your shoulders, pull your navel in, and squeeze your glutes. If lower back discomfort continues, switch to a knee plank or wall plank until your core is strong enough to support the full position.
Five common mistakes and how to correct them:
Sagging hips: Your core isn’t engaged enough. Pull your navel toward your spine and squeeze your glutes to lift your hips back into line.
Hips too high: You’re taking load off your abs. Lower your hips until your body forms one straight line from head to heels.
Arched lower back: Tilt your pelvis slightly under (like tucking your tailbone) and tighten your abs to flatten your spine.
Holding your breath: Breath-holding spikes blood pressure and cuts your hold time. Practice steady nasal inhales and mouth exhales.
Head hanging or lifted: Keep your neck neutral by looking a few inches in front of your hands, not straight down or forward.
Safe Progression Strategies for Building Plank Endurance
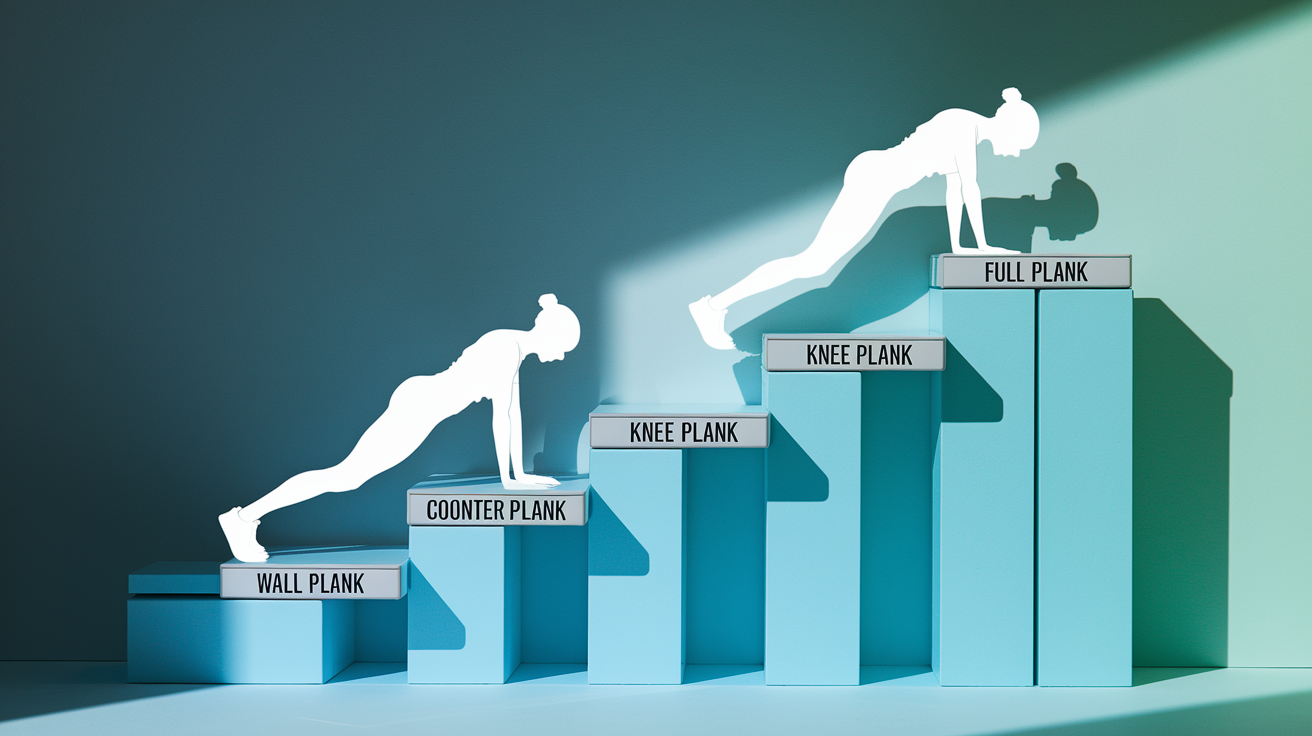
Progress by adding a few seconds each week once your form stays clean for your current hold time. If you can complete your target hold without sagging, shaking badly, or compensating, you’re ready to add time or move to a harder variation. If your form breaks before the timer, stay at your current level and keep practicing twice a week until it feels controlled.
Beginners should train planks two to three times per week, with at least one rest day between sessions. Your core muscles need recovery just like any other muscle group. Once you can hold a wall plank for over a minute, test the next level (elevated plank on a counter or chair). When that becomes easy, move to a knee plank, then finally to a full plank on the floor.
| Level | Hold-Time Goal | Progression Trigger |
|---|---|---|
| Wall plank | 30–60 seconds | Move to counter when you can hold 60+ seconds cleanly |
| Elevated plank (counter or chair) | 30–60 seconds | Move to knee plank when form stays perfect for 60+ seconds |
| Full plank (floor) | 20–60 seconds | Add movement variations (hip raises, single-arm) when you hit 60 seconds |
Once you reach a solid one-minute hold on the floor, you can start layering in movement. Hip raises, shoulder taps, or leg lifts. This keeps building strength without just chasing longer static holds.
A Beginner Plank Routine for Building Core Strength Safely

A simple beginner plank routine fits into any workout as a warm-up, core finisher, or standalone session. You don’t need a gym or equipment. Just a timer, a mat, and enough space to extend your body. Start with one or two variations per session and focus on quality over quantity.
Here’s a basic routine you can use two to three times per week. Adjust the level and hold time to match your current ability. Warm up with a few minutes of light movement (arm circles, marching in place, or cat-cow stretches) before you start.
Beginner plank routine:
- Choose your plank level (wall, counter, knee, or floor).
- Set a timer and hold your plank for 20 to 30 seconds with steady breathing.
- Rest for 30 seconds.
- Repeat for 3 to 5 rounds total.
- Finish with a child’s pose or gentle spinal stretch to release tension.
As you get stronger, increase your work time by 5 seconds each week or add a second variation (like a side forearm plank or hip raises) into the rotation. Track your hold times in a notebook or on your phone so you can see your progress week to week. That measurable improvement keeps you motivated and tells you when it’s time to level up.
Safety Considerations and When Beginners Should Modify Planks
Floor planks can be risky for seniors, people with obesity, anyone with joint or shoulder problems, and anyone who has trouble getting down to the floor or back up safely. If any of those apply to you, start with wall or counter planks and progress slowly. There’s no shame in using a regression. Every level builds the same core strength, just with different load.
Stop immediately if you feel sharp pain in your lower back, shoulders, or wrists. Muscle fatigue is normal. Pain is a signal that something is wrong. Realign your form, switch to an easier variation, or end the set. If discomfort continues, consult a doctor or physical therapist before continuing plank training. Always use a non-slip mat to protect your wrists and knees and to keep your hands and feet from sliding during the hold.
Final Words
Get moving: you followed a quick, step-by-step setup, checked neutral spine and shoulder stacking, and learned basic hold times and breathing cues. You also saw which muscles planks target and safer regressions to keep form solid.
Use the progression plan, start with 10–20 seconds, add a few seconds each week, and train planks 2–3 times a week. When form slips, drop to a wall or knee variation.
Practice these planks exercise for beginners consistently, track small wins, and it adds up. You’re building real core strength—keep going.
FAQ
Q: How long should a beginner do a plank for?
A: A beginner should hold a plank for 10–20 seconds to start, add 5–10 seconds weekly, and work toward 30–60 seconds; a 30s work/30s rest pattern is a useful short-term goal.
Q: Can I do planks with prolapse?
A: Planks with prolapse should be approached cautiously; check with your healthcare provider first. Use regressions like wall, incline, or knee planks, avoid breath-holding, and rebuild pelvic-floor control with a clinician’s guidance.
Q: Are planks good for bone density?
A: Planks help core strength and posture but give limited bone-density stimulus; add weight-bearing moves like walking, squats, and resistance training for stronger bone benefits alongside planks.
Q: What if I do a 1 minute plank everyday?
A: Doing a 1-minute plank every day can improve core endurance and posture, but may cause plateaus or overuse; prefer 2–3× weekly, mix plank variations, and increase time gradually.