

Think you need an hour in the gym to get stronger?
You don’t.
In 30 minutes you can hit every major movement pattern with just four exercises: row, step-up, swing, and single-arm press.
One dumbbell, one kettlebell, and a bench or box is all the kit you need.
Run it AMRAP (as many rounds as possible) for conditioning, or use heavier sets with longer rest for pure strength.
This post gives the exact circuit, form cues, progressions, and rest plans so you can get stronger fast.
Complete Breakdown of a Time-Efficient 4-Exercise Full-Body Circuit
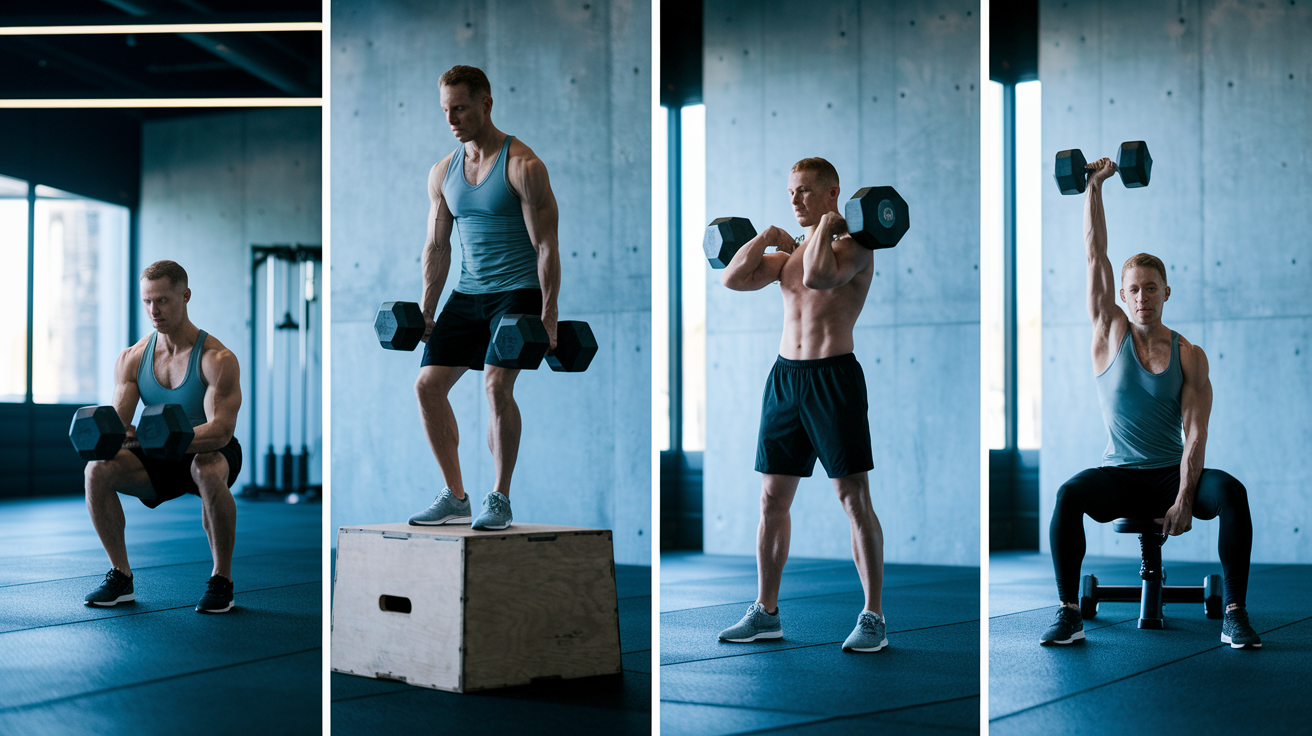
This circuit covers all major movement patterns in four exercises: a pull (single-arm dumbbell row), a squat (goblet step-up), a hinge (kettlebell swing), and a push (seated single-arm overhead press). You’ll hit your upper back, rear delts, glutes, quads, hamstrings, hips, shoulders, triceps, and core in one session. Equipment is minimal. One dumbbell, one kettlebell, and a bench or box.
The structure is straightforward. You can run this as an AMRAP-style workout, completing as many rounds as possible in 30 minutes with 60 to 90 seconds of rest between rounds. Or you can choose a heavier strength-focused approach: complete three rounds with 2 to 3 minutes of rest between each round to allow near-maximal loading. Most people will finish 2 to 5 total rounds depending on load, fitness level, and rest strategy. Each round totals roughly 79 reps across all exercises, so pacing and rest management matter.
The four exercises are:
- Single-Arm Dumbbell Row – targets upper back, rear delts, and core. 10 reps per side. Use a dumbbell or TRX alternative.
- Goblet Step-Up – builds single-leg strength in glutes, quads, and hamstrings. 12 reps per side. Hold a dumbbell or kettlebell at chest height and use a box or bench.
- Kettlebell Swing – loads the posterior chain (glutes, hamstrings, hips, core). 15 reps. Use a kettlebell or dumbbell with hip drive, not arm lift.
- Seated Single-Arm Overhead Press – hits shoulders, triceps, and core. 10 reps per side. Sit upright, brace, and press to full lockout.
Run this circuit 2 to 3 times per week with at least 48 hours between sessions to allow recovery. A 2021 study found that circuit training significantly reduced fat mass, increased muscle mass, improved strength, and increased VO2 max. The AMRAP structure keeps intensity high and heart rate elevated, while the strength-focused version lets you load heavier and build more pure force.
Warm-Up Essentials for a Stronger 30-Minute Circuit

Warming up improves safety, increases power output, and smooths out movement patterns before you load the circuit. Five minutes of dynamic movement raises tissue temperature, primes joints for range of motion, and signals the nervous system to recruit muscle efficiently. Skip this step and you’re asking for stiffer joints, weaker force production, and higher injury risk on the first round.
Your warm-up should include:
- Bodyweight squats – 10 to 15 reps, controlled descent and full hip extension.
- Hip hinges – 10 to 12 reps, practice the hinge pattern you’ll use for swings.
- Arm circles – 10 forward, 10 reverse per arm to prep shoulders.
- Hip mobility drills – leg swings or 90/90 stretches, 30 to 60 seconds total.
- Light jogging or high knees – 60 to 90 seconds to elevate heart rate.
- Core activation – 8 to 10 dead bugs or planks to wake up the abs before loading.
Your target heart rate should feel light to moderate. You should be able to hold a conversation but notice your breathing pick up. Focus on opening the hips and shoulders since three of the four exercises demand hip and shoulder mobility under load. Once you feel warm and your movements feel smoother, transition directly into the first round without sitting down.
How to Perform Each Exercise With Perfect Form

Row Technique Fundamentals
Set up in a split stance or support one knee on a bench. Keep your spine neutral from head to tailbone. No rounding the low back or hunching the shoulders. Hinge at the hips so your torso is close to parallel with the floor, and let the dumbbell hang straight down from your shoulder. Your core should be braced like you’re about to take a light punch to the stomach (firm, not stiff).
Pull the dumbbell by driving your elbow up and back toward the ceiling. Your elbow should track close to your ribs, not flare out wide. Squeeze your shoulder blade in at the top of the pull and hold for half a second. Lower the weight with control. Take 2 to 3 seconds on the way down. The biggest mistake is twisting your torso to yank the weight up. Lock your hips and shoulders in place and let your lat and rear delt do the work.
Step-Up Form Optimization
Choose a box or bench height that allows your lead knee to stay at or slightly below 90 degrees when your foot is planted. Hold the dumbbell or kettlebell at chest level in a goblet position. Step onto the box by pushing through the heel and midfoot of your lead leg, not by pushing off your back foot. Your torso should stay upright and your core braced throughout the movement.
Stand all the way up on top of the box until your hip and knee lock out. Lower yourself by controlling the descent. Don’t just drop back down. Your knee should track in line with your toes, not collapse inward. If your heel lifts or your knee caves, reduce the box height or lighten the load. The common mistake is using momentum from the back leg to cheat the rep. The step-up is a single-leg move, so the working leg should do almost all the lifting.
Swing Mechanics and Hip Power
Stand with feet slightly wider than hip-width, toes pointed slightly out. Grip the kettlebell with both hands and start in a hinged position. Hips back, knees slightly bent, spine neutral, chest proud. The swing begins with a hip hinge, not a squat. Drive your hips forward hard and fast to swing the kettlebell to about shoulder height. Your arms are just ropes. The power comes from your glutes and hamstrings snapping your hips into extension.
At the top, your body should form a straight line from head to heels, glutes squeezed tight, core braced. Let the kettlebell fall back down and hinge at the hips to absorb the weight. Don’t squat it or round your low back. The kettlebell should stay close to your body on the way down, passing between your legs. If your low back hurts or the bell rises way over your head, you’re lifting with your arms instead of driving with your hips.
Overhead Press Alignment and Control
Sit upright on a bench or box with your feet flat and core tight. Hold the dumbbell at shoulder height with your palm facing in (neutral grip) or forward (standard grip). Before you press, take a breath, brace your abs, and lock your ribs down. Don’t let your lower back arch hard or your ribs flare forward. Press the dumbbell straight up until your elbow locks out and the weight is directly over your shoulder joint.
Lower the weight with control, taking 2 to 3 seconds on the descent. Keep your shoulder blade pulled down and back throughout the press. Don’t shrug your trap up into your ear. The biggest mistake is leaning back or arching your spine to cheat heavier weight overhead. If you can’t press it strict and seated, the weight is too heavy.
Modifications for All Fitness Levels in a 4-Move Circuit

Scaling the circuit lets you match the workout to your current strength, mobility, and recovery capacity without losing the training effect. The structure stays the same. The load, reps, and rest change.
| Level | Modification Style | Example Adjustments |
|---|---|---|
| Beginner | Reduce volume and increase rest | Cut reps by 25–50%; use bodyweight or light dumbbells; rest 90–120 seconds between rounds; aim for 2–3 total rounds |
| Intermediate | Follow prescribed work with moderate loads | Use prescribed reps (10/12/15/10); moderate dumbbell/kettlebell weight; rest 60–90 seconds; aim for 3–4 rounds in 30 minutes |
| Advanced | Increase load, reps, or tempo challenge | Add 2–4 reps per set or increase load by 5–10%; shorten rest to 30–60 seconds; add paused or slow eccentric (3–4 seconds) for hypertrophy |
Choose your level based on how the reps feel, not how they look on paper. If your form breaks down in the last few reps or your RPE (rate of perceived exertion on a 1–10 scale) pushes past 8 or 9, dial back the load or reps. If you finish rounds feeling like you had three more reps left in the tank and your RPE stays below 6, increase the challenge. Joint comfort is the final filter. If a movement causes sharp pain or grinding, swap it for a similar pattern that feels clean.
Structuring Rest, Tempo, and Intensity for Strength Gains
Rest strategy depends on your training goal. If you want pure strength, use 2 to 3 minutes of rest between rounds so you can lift heavier weight with good form on every set. If you want a strength and conditioning blend, rest 60 to 90 seconds between rounds to keep your heart rate elevated and challenge your work capacity. Advanced lifters chasing conditioning can shorten rest to 30 to 60 seconds, but that limits how much load you can safely handle per rep.
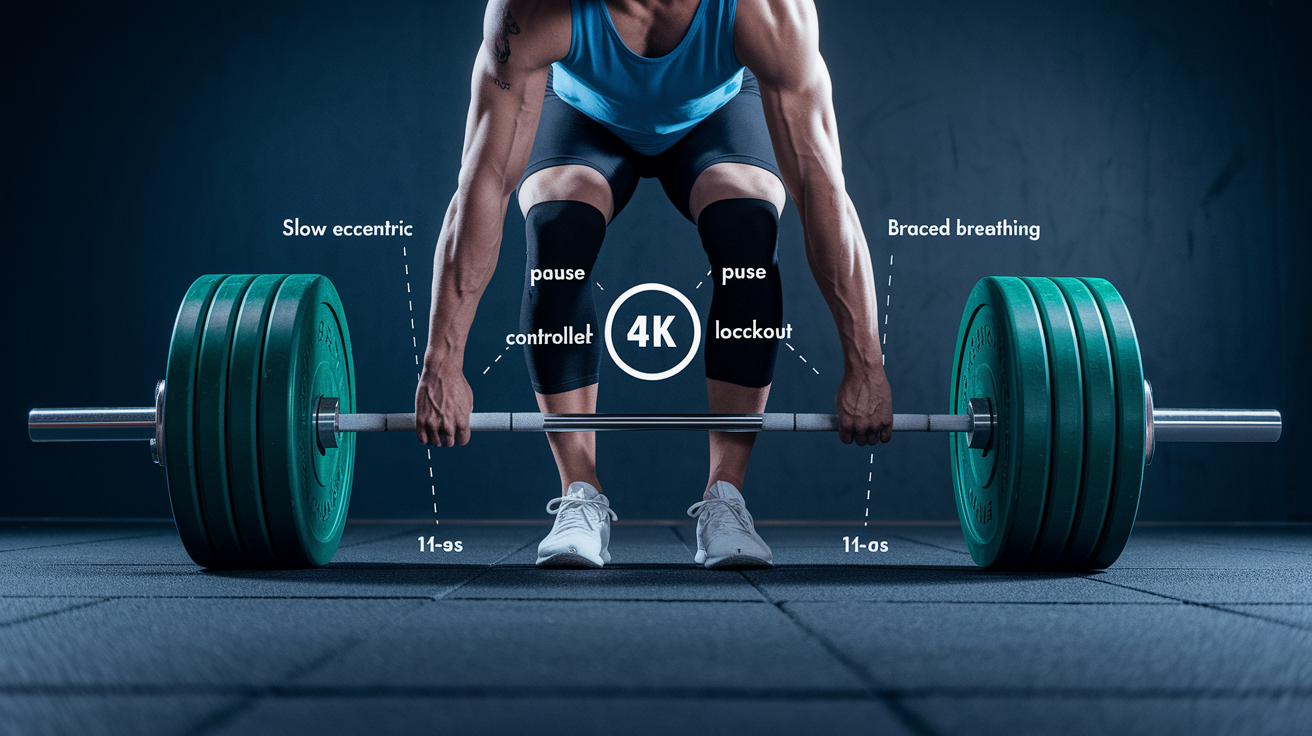
Control your tempo on every rep to increase time under tension and build more strength per set. Four tempo cues to follow:
- Slow eccentric – lower the weight in 2 to 3 seconds on rows, presses, and step-ups to maximize muscle damage and strength adaptation.
- Pause at the bottom – hold the stretched position for half a second on step-ups and rows to eliminate momentum.
- Controlled lockout – finish each rep at full extension (hips locked on swings, elbow locked on presses) to train complete range of motion.
- Braced breathing – breathe in at the top, brace your core, hold your breath through the hardest part of the lift, then exhale at lockout.
Your RPE should sit at 7 or 8 out of 10 for strength work. You should finish each round feeling like you could do one or two more reps, but not five. When you can complete your target rounds at RPE 7 or lower with clean form, increase the load by 2.5 to 5 percent. Small jumps keep progress steady and reduce injury risk.
Tracking Progress in a 30-Minute Four-Exercise Strength Circuit

Tracking progress turns a random workout into a repeatable plan. You need data to know if you’re getting stronger or just getting tired. Progressive overload, doing slightly more over time, is the only reliable way to build strength, and you can’t apply it without measuring what you did last session.
Five simple methods to track improvement:
- Round count – log how many complete rounds you finish in 30 minutes. If you hit 3 rounds this week and 4 rounds next week at the same load, you got stronger.
- Reps per set – record reps for each exercise. If you complete 12 step-ups per side this week and 14 next week, that’s measurable progress.
- Load increases – when you can complete target rounds at RPE 7 or below, add 1 to 2 kilograms (2.5 to 5 pounds) to the dumbbell or kettlebell.
- RPE tracking – note how hard each round felt on a 1 to 10 scale. If the same workout drops from RPE 8 to RPE 6 over four weeks, your work capacity improved.
- Phase adjustments – run a 4 to 6 week AMRAP-focused block with shorter rest, then switch to a 4 to 6 week heavy 3-round strength block with longer rest to keep adaptation fresh.
Write this information in a notebook or phone app immediately after the cool-down. If you wait until later, you’ll forget the details. Compare week to week, not day to day, since fatigue and sleep affect single sessions.
Essential Cool-Down and Recovery for Strength Circuits

Cooling down helps return your heart rate to baseline, clears metabolic waste from working muscles, and begins the recovery process before you walk out the door. Four to six minutes of light movement and static stretching reduces soreness and prepares your body for the next session.
Target these five areas with static holds of 30 to 60 seconds each:
- Hamstrings – seated or standing forward fold to release tension from swings and step-ups.
- Quads – standing quad stretch or couch stretch to open the hip flexors after loaded lunges and presses.
- Glutes – figure-four stretch or pigeon pose to restore hip range of motion.
- Chest – doorway or wall stretch to counteract internal rotation from pressing.
- Shoulders – cross-body arm pulls and overhead tricep stretches to release pressing and rowing tension.
Space full-body circuit sessions 48 to 72 hours apart. Two to three sessions per week is the recommended frequency. Your muscles grow and strengthen during recovery, not during the workout, so treat rest days with the same discipline you bring to training days. Sleep 7 to 9 hours per night to support tissue repair and nervous system recovery. Drink enough water that your urine stays light yellow throughout the day. Dehydration reduces strength output and increases injury risk, especially in high-rep circuits where grip and core stability matter.
Final Words
Get moving. This post gives a compact 4-exercise circuit that hits push, pull, hinge, and squat so you can get stronger in 30 minutes. Short warm-up, clear form cues, and two ways to run it (AMRAP or a heavier 3-round option) keep it practical.
Track rounds, reps, and small load bumps. Rest, tempo, and recovery matter, so plan 2–3 sessions a week and allow 48–72 hours between full-body days.
Keep it simple and steady. Use the 4-exercise full-body circuit to build strength in 30 minutes and you’ll see real, sustainable progress.
FAQ
Q: Is a 30-minute full-body strength workout enough? Are 4 exercises enough for full-body?
A: A 30-minute full-body strength workout can be enough; four well-chosen compound exercises can cover push, pull, hinge, and squat patterns to build strength and improve conditioning.
Q: What is the 3-3-3 rule for workout?
A: The 3-3-3 rule usually means doing three sets of three reps for a main lift, using heavy loads and full recovery between sets to focus on maximal strength development.
Q: What is a 30-minute circuit workout?
A: A 30-minute circuit workout is a sequence of exercises done back-to-back with short rests, often AMRAP or timed rounds, mixing strength and cardio for efficient conditioning and strength gains.