

You don’t need more leg strength, you need mobility.
If your hips won’t open, your ankles feel locked, or you keep tipping forward at the bottom, it’s not a strength problem.
When you can’t get into the right position you can’t use the muscles you’ve built.
A short, targeted mobility routine fixes the exact limits that steal depth and make deadlift setup sloppy.
Run these five drills two to four times per week and you’ll move better, load better, and lift more without adding hours to your program.
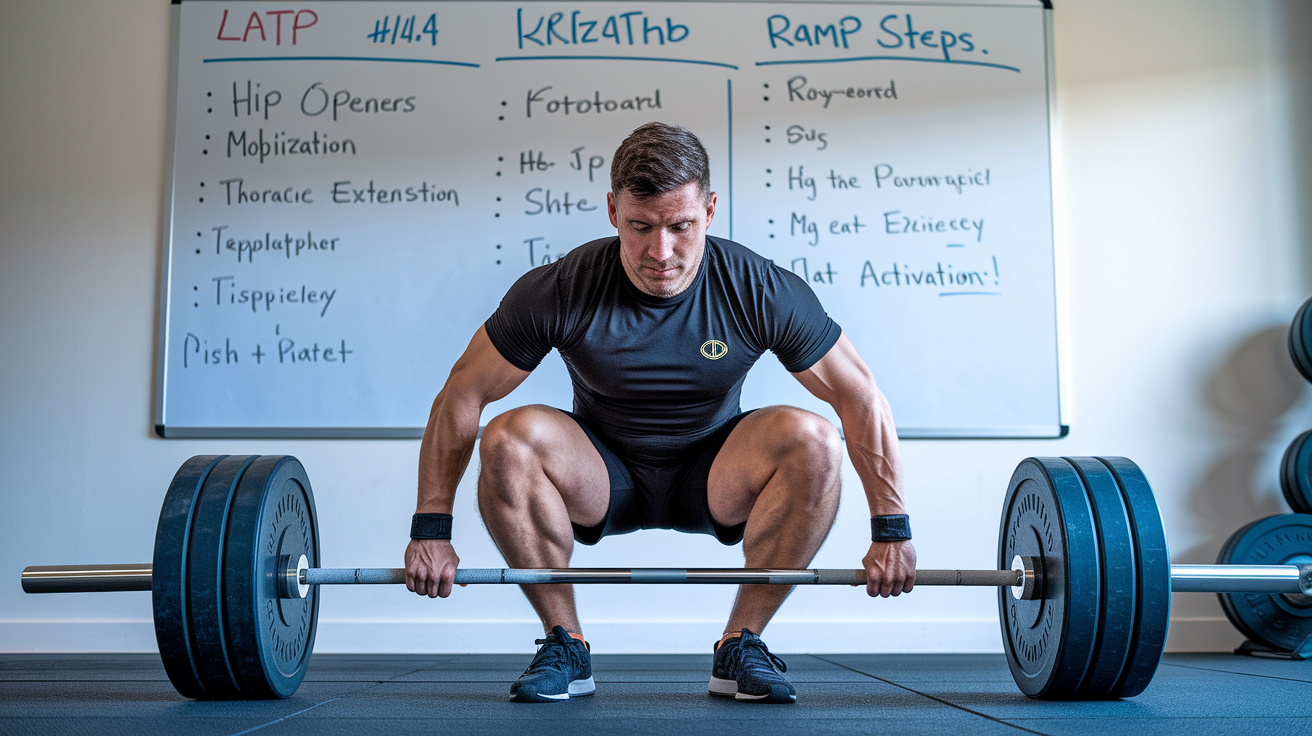
Foundational Mobility Drills That Directly Improve Squat and Deadlift Mechanics
Your hips won’t open. Ankles feel locked. You keep tipping forward at the bottom of your squat.
That’s not a strength problem. It’s mobility.
When you can’t get into position, you can’t use the muscles you’ve built. A short, targeted mobility routine fixes that.
These five drills address the most common restrictions that mess with squat depth, deadlift setup, and barbell positioning. Each one targets a specific joint or tissue limiting your ability to sit deep, hinge cleanly, or stay upright under load. Run through this two to four times per week, after training or on rest days.
Foundational squat and deadlift mobility routine:
Spinal Twist, Single Leg – Lie on your back, pull one knee across your body toward the floor with the opposite hand, look over the opposite shoulder. Both shoulders stay flat. This improves upper back rotation and reduces thoracic stiffness during setup. Hold each side for the assigned time, then switch.
Hurdler Stretch – Sit with one leg extended and the other bent so your foot touches your inner thigh. Fold forward from your hips toward the extended leg’s toes. Targets hamstring length, improves your ability to hinge cleanly at the hip during deadlift setup.
Yoga Squat (Malasana) – Stand with feet roughly shoulder width, squat as deep as you can, press your elbows against the inside of your knees to push them outward. Hold the bottom. Opens your hips and ankles, makes the squat bottom position more comfortable and controlled.
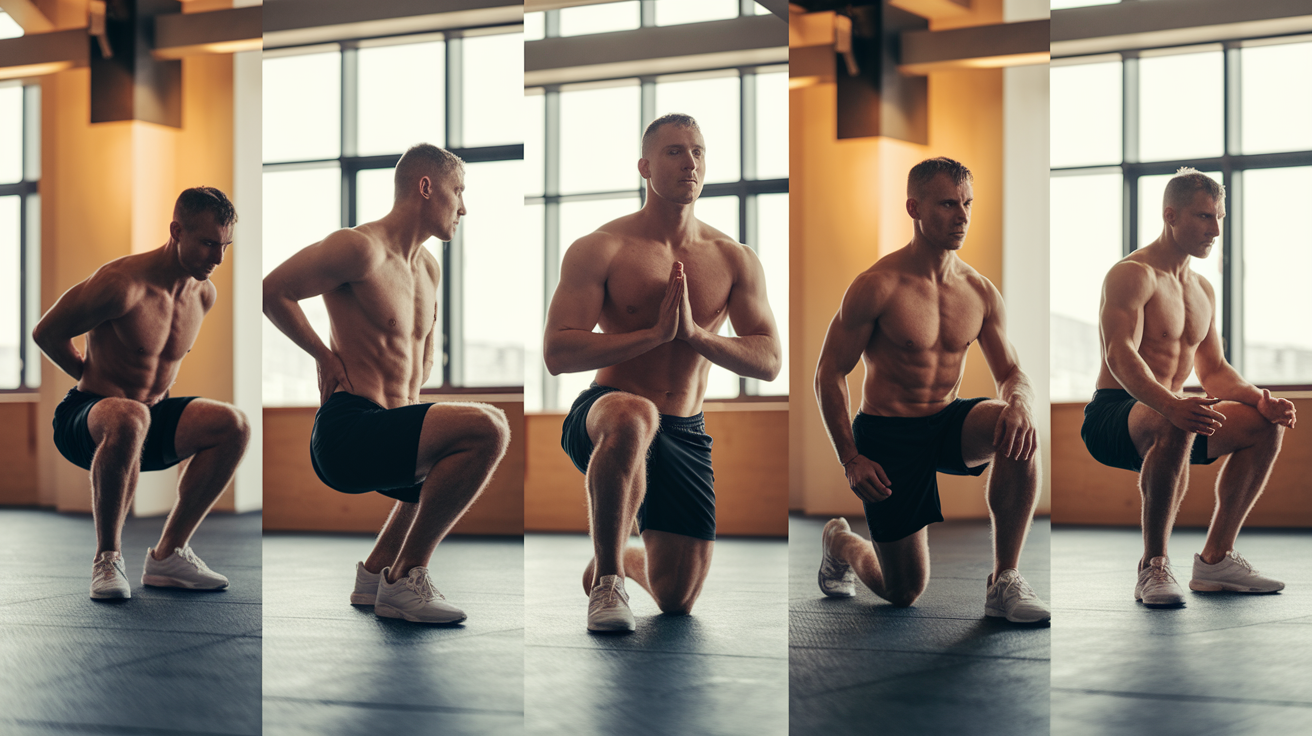
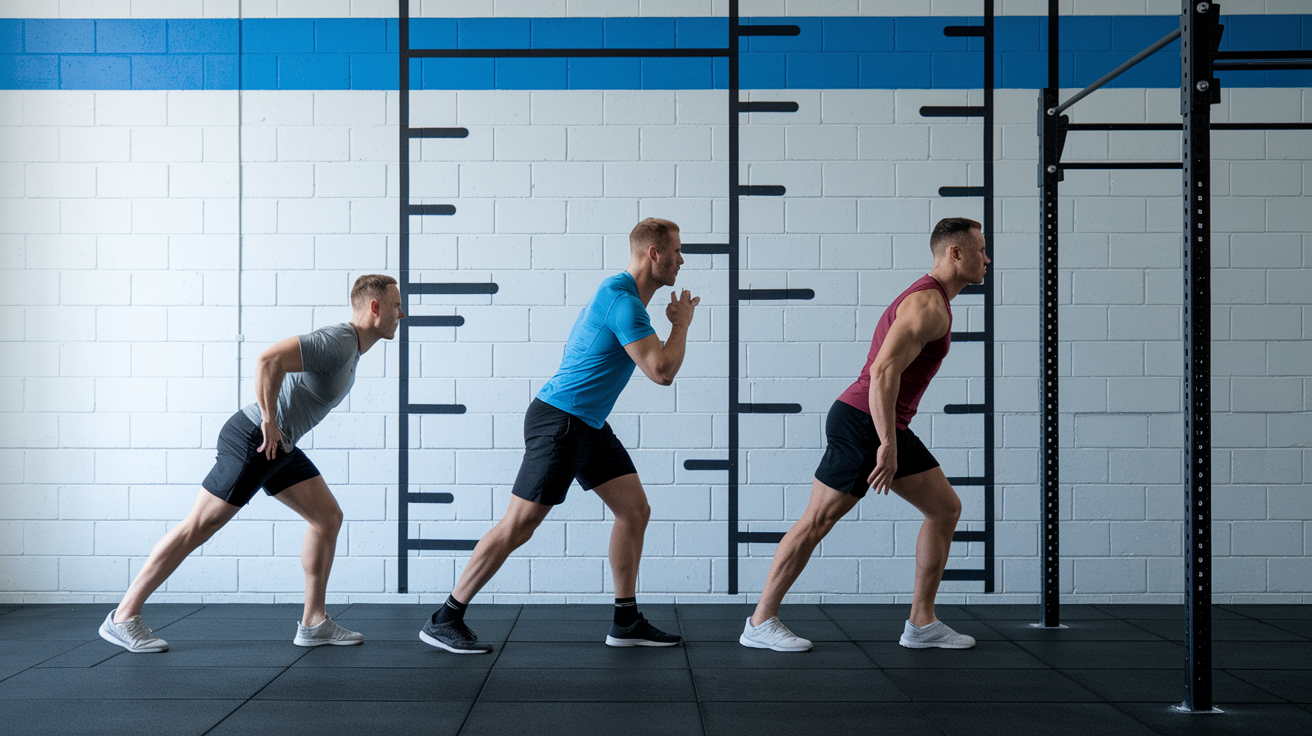
Kneeling Lunge – Step one foot forward into a lunge, drop your back knee to the floor. Keep your hips square and lean forward slightly. Stretches the hip flexors, reduces compensations that show up when your hips can’t extend fully during squats or deadlifts.
Wall Calf Stretch – Face a wall, hands against it, step one foot back. Bend your front knee while keeping your back heel flat on the floor. Push the stretch into your calf and Achilles. Better ankle dorsiflexion helps you reach squat depth without collapsing forward and improves force transfer during deadlifts.
Hold each drill for the assigned time. Perform symmetrically on both sides where relevant. These aren’t fancy, but they work because they match the exact positions and ranges your squat and deadlift demand.
Advanced Hip Mobility Progressions, Regression Options, and Diagnostic Tests
Before you pile on more hip drills, figure out which part of your hip is actually the problem.
Sit on the floor with your legs straight out in front of you. Bend one knee and rotate it outward, trying to lay your thigh flat on the floor while keeping your other leg straight. If one side won’t go down, or if you have to lean or twist your torso to make it happen, you’ve found a rotational deficit.
Now stand and shift your weight to one leg. Try to slide the other leg out to the side as far as you can without your pelvis tilting. If one side feels tight or unstable, that’s an adductor or lateral hip capsule issue.
Hip restrictions show up as one-sided depth limits, knee cave during the ascent, or an inability to keep your torso upright when you try to sit into a deep squat. The hip capsule (the connective tissue bag around the ball-and-socket joint) can tighten in specific directions, especially if you sit a lot or favor one side during daily movement. Rotational deficits make it hard to externally rotate your femur and push your knees out, which is essential for squat depth and sumo deadlift setup.
Advanced and regressed hip mobility variations:
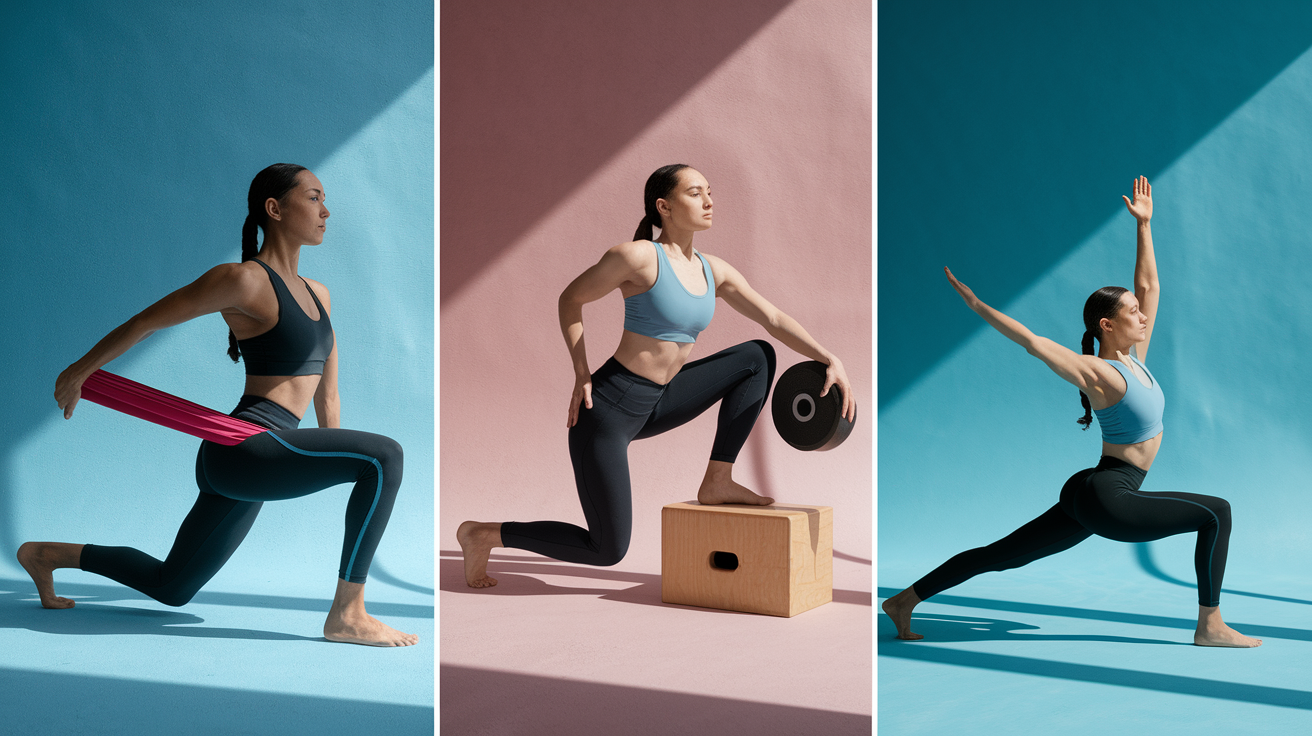
Banded Kneeling Lunge – Loop a resistance band around your front hip and anchor it behind you. Perform the kneeling lunge while the band pulls your hip into flexion, creating a deeper stretch and active load through the restricted range.
Loaded 90/90 Rotations – Sit in a 90/90 position (both knees bent at 90 degrees, one leg internally rotated and one externally rotated). Hold a light weight plate or dumbbell and rotate from side to side, lifting your hips slightly off the ground to intensify the demand on hip rotation.
Pigeon Pose Regression (Supported) – If a full pigeon pose is too intense, place a yoga block or folded towel under the hip of your bent leg and support your torso on your hands or forearms. Gradually remove the support as your tolerance improves.
Bulgarian Split Stretch With Torso Adjustments – Set up in a Bulgarian split squat position (rear foot elevated). Instead of driving straight down, lean your torso forward to emphasize hip flexor stretch or rotate slightly to bias one side of the hip capsule.
Cycle these progressions three to four times per week on days when you aren’t performing the foundational routine. Pick the variation that targets your specific test failure and spend two to three weeks there before progressing or rotating to another drill.
Ankle Mobility Diagnostics and Advanced Dorsiflexion Progressions
When your ankle can’t bend forward enough, your knee can’t travel over your toes. Your torso has to pitch forward to keep the bar over your midfoot. You lose tension, your quads disengage early, your lower back takes over.
Different dorsiflexion deficits show up in different ways. If one ankle is tighter, you’ll shift to the opposite side at the bottom of your squat. If both are tight, you’ll either cut depth short or your heels will lift off the floor.
Advanced ankle mobility drills:
Banded Anterior Ankle Glide – Loop a resistance band around the front of your ankle, anchor it low behind you, step forward into a lunge. Drive your knee over your toes while the band pulls your ankle joint backward, creating space in the front of the joint.
Weighted Knee-Over-Toe Lunge – Hold a light dumbbell or kettlebell and step into a deep lunge. Pause with your knee fully over your toes and your heel flat on the floor. The load increases the stretch demand and builds strength in the new range.
Deficit Calf Raises – Stand on the edge of a step or plate with your heels hanging off. Lower your heels as far as you can, hold for a few seconds, then press up. This trains both the stretch and the strength needed to control dorsiflexion.
| Test | What It Reveals |
|---|---|
| Heel-elevated squat test | If depth improves significantly with a plate under each heel, dorsiflexion is the limiting factor. |
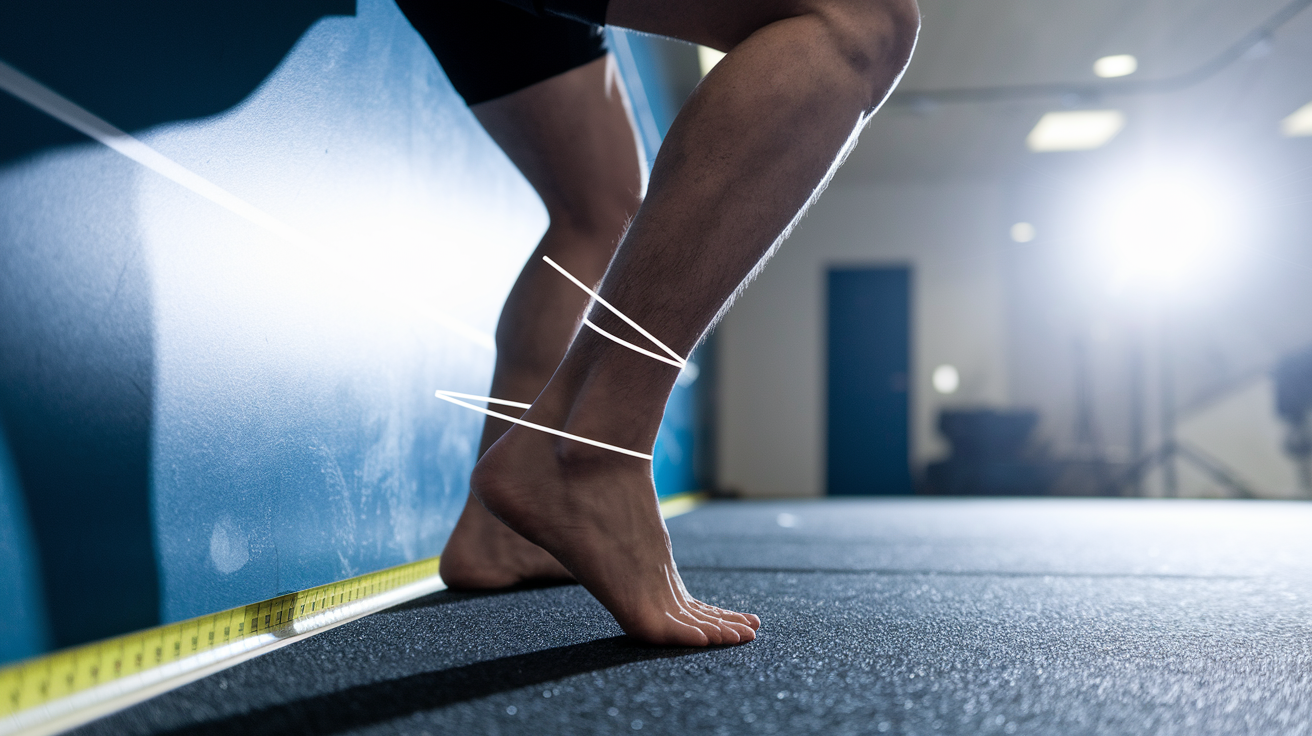
| Knee-to-wall measurement | Stand facing a wall and slide your foot back until your knee can just touch the wall with your heel flat. Measure the distance from your big toe to the wall. Less than 4 inches indicates limited dorsiflexion. |
| Lunge depth symmetry check | Perform a lunge on each leg and compare how far forward your knee can travel. Asymmetry suggests a one-sided restriction. |
Use regressions when a test reveals severe limitation or compensatory movement. Start with the wall calf stretch from the foundational routine and short-range banded glides. Apply progressions when you can pass the basic tests but want to build more usable range under load. Add the weighted lunge and deficit raises. Retest every two weeks and adjust your drill selection based on measurable improvement.
Thoracic and Shoulder Mobility Progressions With Screening Methods

A stiff upper back forces you to lean forward in the squat and makes it nearly impossible to keep your lats engaged during deadlift setup.
To find out whether your limitation is extension or rotation, try this. Stand sideways in front of a mirror, relax your posture, look at the curve of your upper back. If you see a pronounced rounding between your shoulder blades, that’s an extension deficit. Now simulate holding a barbell on your back. Clasp your hands behind your head and try to lift your elbows and chest. If your elbows stay low or your ribs flare forward, your thoracic spine isn’t extending.
For rotation, stand with your arms crossed over your chest and rotate as far as you can to each side without moving your hips. If one side is noticeably shorter or if you feel a hard stop, that’s a rotational restriction.
Shoulder restrictions show up when you struggle to get your hands into the right position on the bar, when your elbows point backward instead of down during a front squat, or when you can’t pull your shoulder blades together tightly during deadlift setup. Limited shoulder external rotation makes it hard to keep the bar stable on your back. Poor scapular control lets the bar drift forward. Both issues compromise bar path and make bracing less effective.
Advanced thoracic and shoulder mobility drills:
Banded Thoracic Extensions – Loop a resistance band around a pull-up bar at chest height, hold the ends, step back to create tension. Hinge at your hips, let the band pull your arms overhead, sink your chest toward the floor. The band provides overpressure that increases the stretch demand.
Loaded Pass-Throughs – Hold a PVC pipe, broomstick, or resistance band with a wide grip. Keeping your arms straight, rotate the pipe over your head and behind your back, then reverse the movement. Gradually narrow your grip as your range improves.
Wall-Supported Rotation Progressions – Stand facing a wall with your hands pressed against it at shoulder height. Rotate one arm up toward the ceiling while keeping the other hand in contact with the wall. This isolates thoracic rotation and reduces compensation from your lower back.
Rack-Position Scapular Opener – Set up in a front-rack position (elbows high, barbell or dowel resting on your shoulders). Press your elbows forward and up, then retract your shoulder blades and pull your elbows down and back. This trains the scapular control needed to stabilize the bar during squats.
How to Identify Thoracic Restrictions Quickly
Compare three positions. Relaxed standing posture, barbell-on-back simulation with clasped hands behind your head, and overhead reach with arms fully extended.
If your upper back rounds in the first, your elbows stay low in the second, or your ribs flare and your lower back arches excessively in the third, your thoracic spine lacks the extension or rotation needed for clean squat and deadlift mechanics. Use these quick checks before every mobility session to decide which drills to prioritize.
Posterior Chain Mobility and Activation Progressions for a Stronger Hinge
Tight hamstrings are only part of the problem.
When your posterior chain doesn’t fire in the right order (glutes first, then hamstrings, then lower back), you lose tension at the bottom of the deadlift and your hips rise faster than your chest. Poor sequencing often comes from a pelvis that’s stuck in anterior or posterior tilt, which changes the length-tension relationship of your hamstrings and glutes. Neural tension can also limit your hinge. If the sciatic nerve feels tight or pulls when you bend forward, your body will shut down range and force to protect the nerve.
Advanced posterior chain mobility and activation drills:
Deficit RDL Mobility Reps – Stand on a low platform or pair of plates (one to two inches) and perform Romanian deadlifts with a light load, focusing on reaching as deep as you can while keeping your back neutral. The deficit increases the stretch demand on your hamstrings and trains your hinge pattern through a greater range.
Band-Resisted Hip Hinge Activation – Loop a resistance band around your hips and anchor it behind you at waist height. Hinge forward against the band’s pull, pause at the bottom, then drive your hips forward to stand. The band teaches you to load your posterior chain before you pull and reinforces the hip-dominant pattern.
Loaded Hamstring Isometric Holds – Set up in the bottom position of an RDL with a barbell or kettlebell. Hold the stretch position for 10 to 20 seconds, maintaining tension in your hamstrings and glutes without letting your lower back round. This builds strength and control in the lengthened range.
Advanced Neural Tension Sliders – Sit on the floor with one leg extended and the other bent. Slowly flex your extended foot toward your shin and tuck your chin to your chest, then point your foot and look up. Repeat for several slow reps. This “flossing” movement reduces neural tension and can improve hamstring range when tightness is nerve-related rather than muscular.
Use these progressions on deadlift training days or as a standalone session the day after heavy hinge work. Perform two to three sets of each drill, keeping the load light enough that you can move smoothly and hold the end ranges without compensation.
Full-Body Mobility Programming for Squat and Deadlift Days
When you’re training squat, deadlift, and accessory work in the same session, you can’t afford a 30-minute warm-up.
Use the RAMP structure: Raise, Activate and Mobilize, Potentiate. You’ll prepare your body in 15 to 25 minutes.
Start with three to five minutes of light movement to raise your heart rate and core temperature. A yoga flow, high knees, butt kicks, or inchworms. Then spend six to twelve minutes on active mobility drills that target the joints you’ll load hardest that day. If you’re squatting heavy, prioritize hip openers, ankle mobilizations, and thoracic extensions. If you’re pulling, add hamstring and lat work. Finish with five to ten minutes of potentiation: empty-bar squats or deadlifts, progressively adding weight in small jumps until you reach your first working set.
On full-body training days with multiple heavy lifts, shorten the per-lift ramp to eight to twelve minutes and focus your longest warm-up on whichever movement comes first. If you squat first, run the full RAMP for squats, then use just a few light sets and one or two mobility drills before deadlifting.
If your schedule allows, add a 20 to 30 minute standalone mobility session on a rest day or as a second daily session. These longer sessions let you work through all four priority areas (hips, ankles, thoracic spine, shoulders) without rushing, and they’re especially useful if you’ve identified a specific restriction that needs extra volume.
Track frequency and consistency as closely as you track your lifts. Perform short mobility routines two to four times per week if you have known restrictions. If your mobility is already solid, maintain it with one or two brief sessions per week and rely on your full-range-of-motion strength work to preserve what you’ve built. Once you’ve normalized your mobility, regular squatting and deadlifting through full depth will keep your ranges functional without needing dedicated mobility work every week.
Troubleshooting Common Squat and Deadlift Mobility Limitations
Start with an assessment, not a random drill.
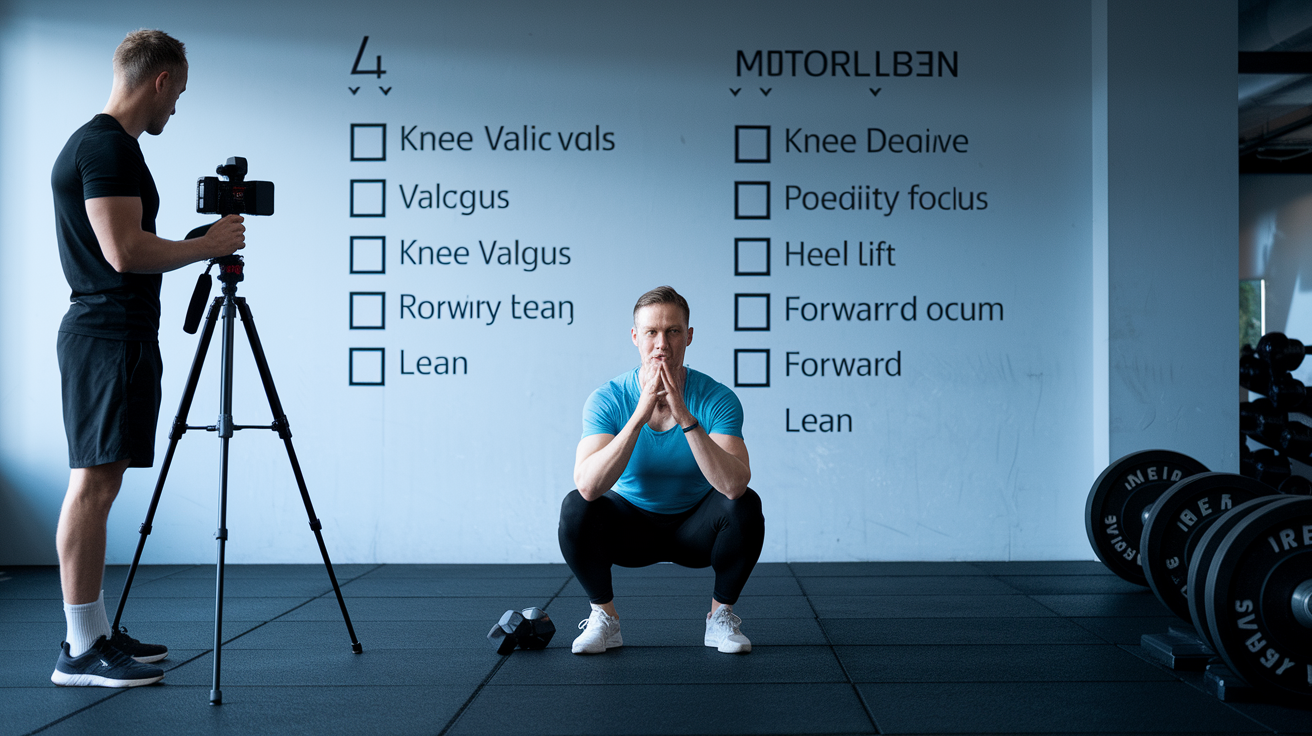
Film a bodyweight squat from the side and front, then watch for these signs: do your toes flare out excessively, does one hip shift to the side at the bottom, do your heels lift, or does your torso pitch forward before you reach depth? Each pattern points to a specific joint or tissue restriction you can address with targeted work.
Five common mobility problems and advanced fixes:
Limited hip rotation causing knee valgus or unilateral depth limits – Use banded 90/90 lift-offs. Sit in a 90/90 position, loop a light band around your front knee, lift your hips off the ground while rotating into the restricted range. Perform two to three sets of eight to ten reps on the limited side.
Ankle dorsiflexion deficit preventing depth or causing forward lean – Add loaded ankle mobilizations. Hold a light dumbbell in the goblet position, step into a lunge, drive your knee forward over your toes while keeping your heel flat. Pause for three to five seconds at the end range. Perform three sets of six to eight reps per leg.
Thoracic rounding during squat setup or deadlift lockout – Use band-resisted thoracic extensions. Anchor a band at chest height, hold the ends, step back, hinge forward while the band pulls your arms overhead. Sink your chest toward the floor and hold for 20 to 30 seconds. Perform two to three sets before lifting.
Hinge stiffness or posterior chain shutdown during deadlift setup – Program deficit hinge reps. Stand on a one to two inch platform and perform RDLs with 40 to 50 percent of your working deadlift weight. Focus on reaching deep while maintaining a neutral spine. Perform two sets of eight to ten reps as part of your warm-up.
Knee valgus or lateral instability at the bottom of the squat – Add controlled adductor strengthening. Perform Cossack squats or side lunges with a light load, pausing at the bottom of each rep. Build strength in the lengthened position to support improved control. Perform two to three sets of six to eight reps per side twice per week.
Reassess every week using the same video angles and the same bodyweight squat test. Compare your depth, torso angle, knee tracking, and symmetry to your previous recording. If a restriction improves, rotate to a different drill or reduce frequency. If it plateaus, increase volume or progress to a harder variation. Mobility gains happen when you measure, adjust, and repeat.
Progression Methods for Long-Term Mobility and Strength Gains
Mobility work follows the same progression rules as strength training. Start with the easiest variation that challenges your current range, add volume or intensity when the movement becomes comfortable, then move to a harder drill.
For beginners, that means starting with unloaded static stretches held for 20 to 30 seconds, performing the foundational five-drill routine two to three times per week, and using bodyweight assessments to track progress. After four to six weeks, when you can pass the basic depth and hinge tests without compensation, move to active mobility drills that add controlled movement through the stretched range. Leg swings, controlled articular rotations, and dynamic lunges.
Advanced lifters should focus on loaded mobility progressions that build strength in newly opened ranges. Add resistance bands to create overpressure, hold light weights in stretched positions, or perform tempo reps with a three to five second pause at the deepest point of each drill.
Track your mobility the same way you track your lifts. Measure ankle dorsiflexion distance with the knee-to-wall test every two weeks, film your squat depth and compare it to previous recordings, and log which side of each bilateral drill feels tighter so you can monitor asymmetry over time.
When your mobility normalizes (when you can hit full squat depth with a neutral spine, hinge cleanly without rounding, and maintain symmetry on all tests), shift your focus to maintaining that range with full-ROM strength work. Perform deficit squats, pause deadlifts, and deep goblet squats as regular training movements, and reduce dedicated mobility work to one or two short sessions per week. Mobility is a tool to access better positions. Once you have those positions, your strength training keeps them functional.
Equipment Options for Home and Gym-Based Mobility Work
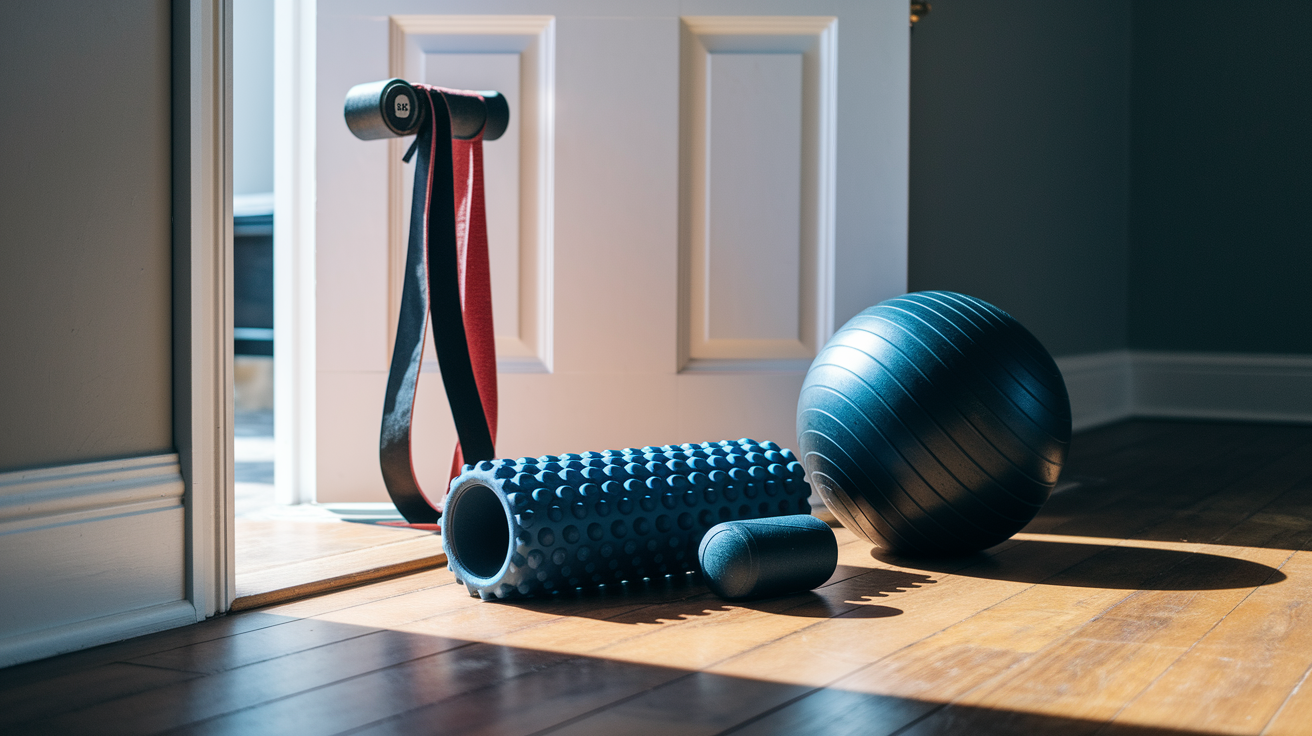
You don’t need much. A resistance band, a foam roller, and a lacrosse ball or small mobility ball will cover nearly every drill in this article.
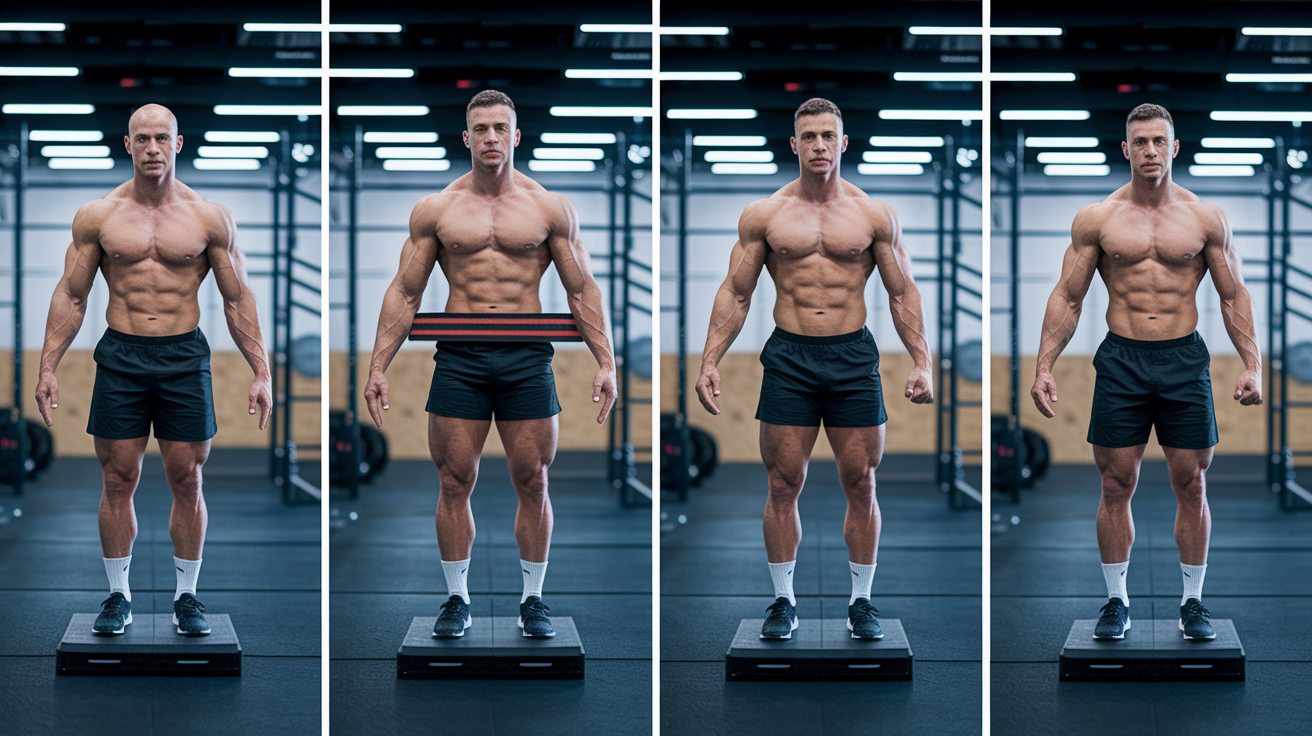
Bands let you add overpressure to stretches, create joint distraction for deeper mobilizations, and provide resistance for activation drills. A 41-inch loop band works for most lower-body applications. A lighter, longer therapy band is better for shoulder and thoracic work.
Foam rollers are useful for broad soft-tissue work on your quads, IT band, lats, and upper back before you start mobility drills. Don’t spend more than two to three minutes per area, and avoid rolling directly over joints or bones. A lacrosse ball or similar small, firm ball gives you more precision. Use it to target specific tight spots in your glutes, hip rotators, or the bottom of your foot. Press into the ball, find a tender point, and hold steady pressure for 20 to 30 seconds while breathing slowly.
If you’re working at home without a pull-up bar or anchor point, use a doorframe, a heavy piece of furniture, or a loaded barbell in a squat rack to secure your band. Many bodyweight drills (90/90 hip rotations, wall calf stretches, thoracic extensions over a couch or bench) require no equipment at all.
The limitation is rarely your tools. It’s whether you’re using the tools you have consistently and targeting the actual restrictions your assessments reveal.
Mobility Frequency, Timing, and Full-Body Training Integration

Dynamic mobility belongs before you lift. Static stretching belongs after or on rest days.
Before a squat or deadlift session, your warm-up should raise your heart rate, move your joints through their full available range with control, and activate the muscles you’re about to load. That means leg swings, hip circles, bodyweight squats, light RDLs, and a few sets of banded glute activation. Not long static holds that can temporarily reduce force output.
After training or on rest days, use static or loaded stretches to improve range over time. Hold each position for 20 to 30 seconds, perform two to three sets per drill, focus on the areas your assessments flagged as restricted. A typical post-training cooldown might include the hurdler stretch, kneeling lunge, wall calf stretch, and a thoracic extension drill, taking 10 to 12 minutes total.
For standalone mobility sessions, set aside 20 to 30 minutes and work through all four priority areas: hips, ankles, thoracic spine, and shoulders. Use this structure: three to five minutes of general movement to raise your temperature, then rotate through two to three drills per area, holding or repeating each for the prescribed volume. Perform these sessions two to four times per week if you have significant restrictions, or once or twice per week for maintenance once your mobility normalizes.
On full-body training days, front-load your warm-up time toward whichever lift comes first. If you squat before you deadlift, spend 12 to 15 minutes on squat-specific mobility and bar ramp sets, then use just five to eight minutes of hamstring, hip hinge, and lat activation before your first deadlift set.
If you’re short on time, combine movements. Perform a few reps of an empty-bar RDL between sets of hip openers, or do banded glute work during your rest periods. Consistency beats perfection. A short, targeted routine done four times per week will improve your positioning more than an hour-long session done once a month.
Final Words
Start with the foundation drills and move into hip, ankle, thoracic, and posterior-chain progressions. Do the quick diagnostics, pick regressions or progressions, and slot them into your RAMP warm-up or separate sessions.
Program mobility 2–4× weekly, use simple tests to track change, and cycle advanced options on hinge or squat days. Keep sessions short and purposeful.
Use this mobility routine to improve squat and deadlift for full body training as part of a steady plan. Small, consistent work adds up. Keep at it.
FAQ
Q: Do squats help lower A1c?
A: Squats can help lower A1c by improving muscle mass and insulin sensitivity, which boosts glucose use. Do resistance sessions 2–3× weekly, combine with cardio and a steady diet for best results.
Q: How do I increase my squat and deadlift?
A: To increase your squat and deadlift, focus on technique, progressive overload (add weight or reps over time), improve hip/ankle mobility, use targeted assistance exercises, train 2–3× weekly and track loads.
Q: What is the 5 4 3 2 1 workout method?
A: The 5-4-3-2-1 method is a descending rep scheme where you do sets of 5, 4, 3, 2, 1 reps with rising weight. Use it for strength focus, longer rests, and a heavy final single near your limit.
Q: Should I do squats if I have osteoporosis?
A: You can do squats if you have osteoporosis with medical clearance. Start supervised, use lighter or bodyweight squats, limit depth (box squats), progress load slowly, and emphasize perfect form and balance work.