

What if most squat injuries start before the bar even leaves the rack?
Sloppy setup beats hard work every time.
This post gives a clear, step-by-step safety checklist for full body training, how to walk out, set your feet, lock your upper back, brace your belly, and run a final systems check before you descend.
Do the steps slow at first, practice them with light weight, then make them automatic.
Do that and you’ll protect your spine and knees, lift with more confidence, and add weight without guessing.
Essential Setup and Safety Checklist for a Proper Barbell Squat

The lift starts when you walk up to the bar. Not when the weight hits your back. Research shows external cues work better for learning and performance. Things like “push the ground away” beat internal cues most of the time. But you need both. During setup, internal cues help you feel tension and alignment. External cues guide the actual movement once you’re loaded.
Your pre-lift checklist needs to become automatic. It’ll feel slow at first. That’s fine. Each step builds the foundation for a controlled, stable rep. After ten or fifteen practice runs, you’ll blow through it in three or four seconds. Until then, don’t rush.
Here’s your full setup:
-
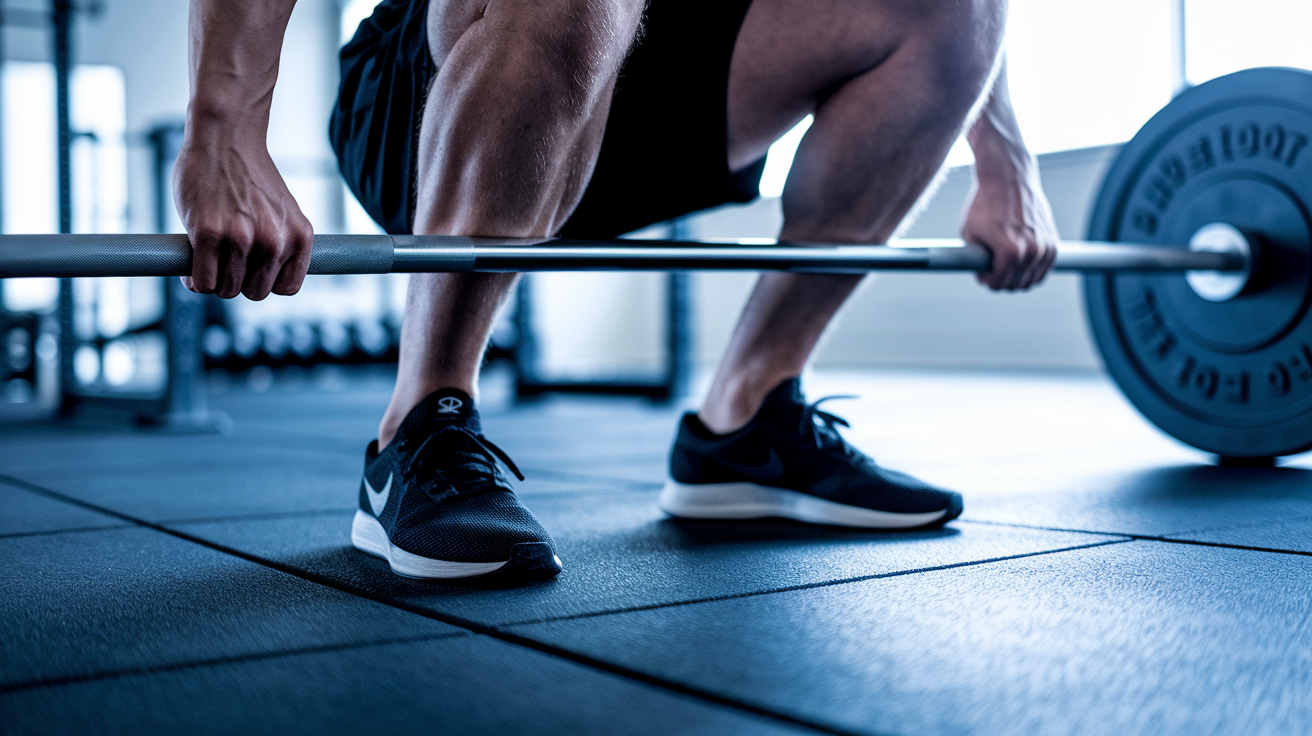
Unrack and walk out. Three steps max. Step back with one foot, bring the other to meet it, then adjust both feet out into your squat stance. No shuffling around.
-
Establish your base. Screw your feet into the floor by externally rotating through your hips. You should feel your arches rise a bit and your glutes fire before you even start descending.
-
Set grip and bar position. Hands go as close together as your shoulders comfortably allow. Closer grip makes upper back tension easier. High bar sits on your traps, low bar rests across your rear delts. Pick based on your build and mobility.
-
Create upper back tension. Scratch your rib cage with your elbows. This locks your lats and stops the bar from shifting. Pre-tensioning your upper back cuts down on spinal movement under load.
-
Breathe and brace. Deep breath into your belly, not your chest. Create 360 degree torso expansion. Front, sides, back. This intra-abdominal pressure acts like an internal weight belt, stabilizing your spine and reducing shear forces on your lower back.
-
Run the final systems check. Feet rooted. Bar locked with upper body tension. Breath and brace engaged. Eyes set on a neutral point straight ahead.
-
Green light. If everything feels solid, descend. If something’s off, reset.
Barbell Squat Stance, Foot Positioning, and Lower Body Alignment
Start with feet at shoulder width. Or slightly wider if your hips feel better there. Turn your toes out about 10 to 15 degrees. This isn’t random. The slight external rotation lets your knees track naturally over your toes as you drop, which keeps your hips from getting pinched and your knees from collapsing inward. Weight should spread evenly across your whole foot at the start, but you’ll drive through your heels coming up.
Before you drop, externally rotate your hips like you’re trying to screw your feet into the floor without actually moving them. You’ll feel your arches lift a little and your glutes fire. That tension is your foundation. Your knees must track over your toes the whole way. If they collapse inward (valgus), you lose stability and jack up injury risk. Your depth goal is bending your knees past 90 degrees when you can do it with good form. Individual hip structure and mobility will affect how deep you can safely go.
Key alignment cues:
- Feet shoulder width or slightly wider, toes 10 to 15 degrees out
- Weight evenly spread, then drive through heels on the way up
- Externally rotate hips to engage glutes and raise arches before descending
- Knees track directly over toes, no inward collapse
- Aim for depth past 90 degrees while keeping neutral spine and upright torso
Bar Placement, Grip Width, Wrist Position, and Upper Body Stability
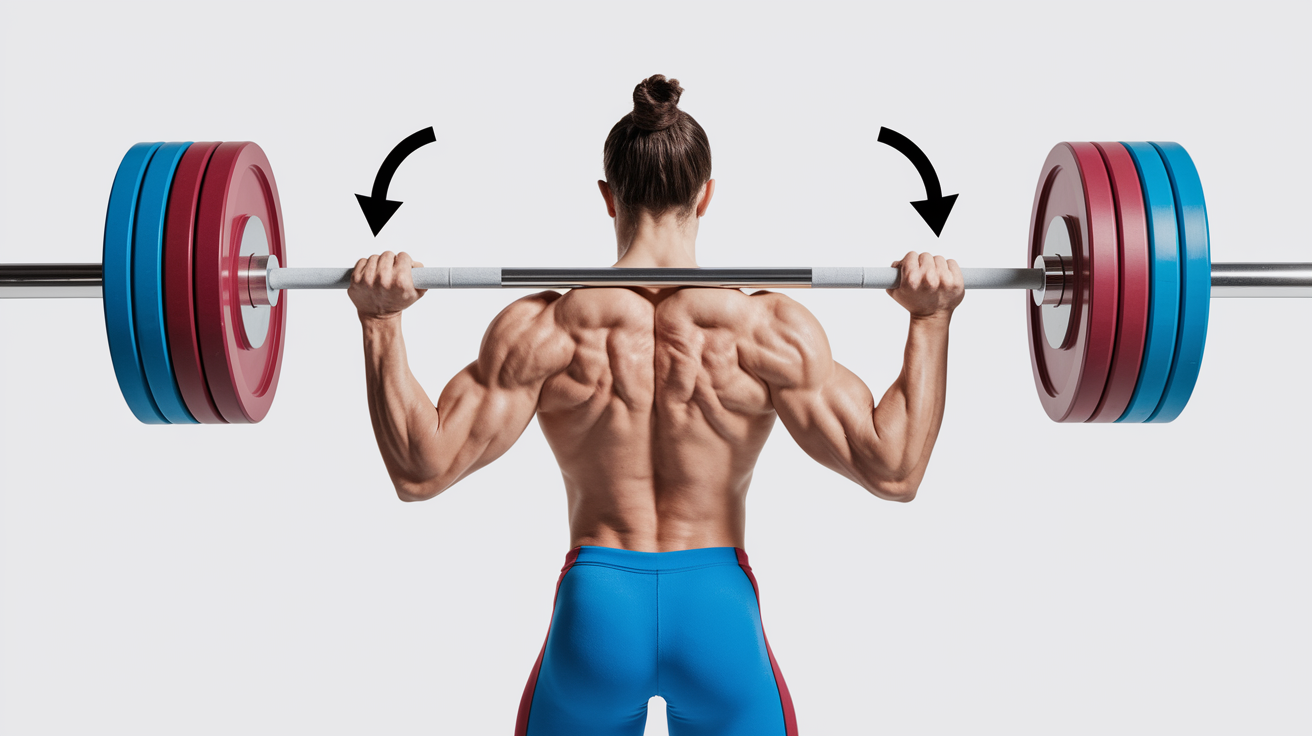
Your hands should sit as close together on the bar as your shoulders comfortably allow. Closer grip makes it easier to pull your shoulder blades together and create the upper back tension that locks the bar in place. If your wrists feel strained, widen your grip slightly until you can keep your wrists neutral. Wrist position should stay straight. Bending your wrists backward under load creates unnecessary strain and kills your ability to transmit force.
Bar placement depends on your build and training style. High bar position means the bar sits on top of your trapezius muscles, just below the base of your neck. This keeps your torso more upright and shifts slightly more demand to your quads. Low bar position places the bar across your rear deltoids, a couple inches lower. Low bar allows a bit more forward torso lean and recruits more posterior chain. Leaner athletes often find high bar more natural. Lifters with bigger torsos or longer femurs often prefer low bar because it accommodates a slight forward lean without rounding the spine.
Upper back tension is non-negotiable. Use the cue “scratch your rib cage with your elbows.” Point your elbows slightly down and back, which pulls your lats tight and keeps your chest up. Research confirms that pre-tensioning your lats before you descend boosts bar stability and reduces unwanted spinal movement under load.
Quick upper body setup:
- Hands as close as comfortable, wrists neutral
- High bar: on traps. Low bar: across rear delts
- Pull shoulder blades together, chest up
- Scratch your rib cage with your elbows to lock lats
Breathing, Bracing, and Neutral Spine Control During the Squat

Bracing protects your spine when you’re holding hundreds of pounds on your back. The technique is simple but takes practice. You’re not just holding your breath. You’re creating pressure inside your torso that acts like internal support. Done correctly, your trunk should feel rigid without excessive pressure building in your chest or face. If you feel all the pressure in your face and your trunk still feels loose, you’re doing it wrong.
Here’s the full breathing and bracing sequence:
-
Stand tall with the bar loaded and stable on your back.
-
Take a deep breath in through your belly, not your chest. Your diaphragm should drop, and your torso should expand in all directions. Front, sides, back.
-
Hold that breath and brace your abs like someone’s about to lightly punch you in the stomach. Firm, not rigid.
-
Keep that 360 degree pressure throughout the descent and the first two thirds of the ascent.
-
Once you pass the hardest part of the lift (the sticking point, usually a few inches out of the bottom), you can exhale or reset your brace if needed.
-
If you’re doing another rep, rebrace at the top before you descend again.
A harder abdominal contraction makes it harder for your spinal erectors to let your spine flex. That’s good when you’re holding a heavy barbell on your spine. This intra-abdominal pressure reduces shear forces on your lower back and keeps your torso stable as your hips and knees move. Neutral spine means keeping the natural slight curve in your lower back. Not exaggerated, not flattened. Just your normal standing posture, locked in place with tension and breath.
Descent, Ascent, and Movement Mechanics for Safe Barbell Squats
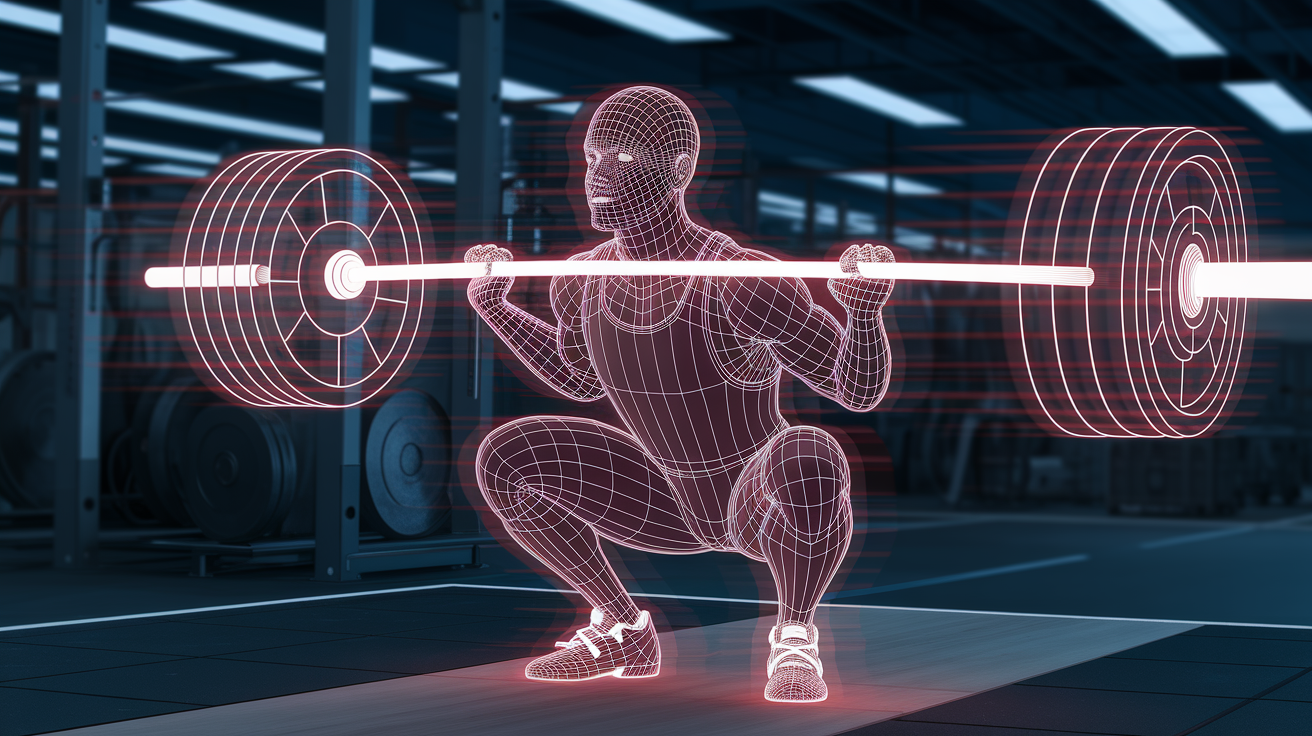
The descent starts with a slight sit back of your hips and a simultaneous break at your knees. Not one then the other. Both together. This keeps your torso vertical and stops you from pitching forward. Keep your feet flat and your weight spread across your whole foot. Your core stays braced, your chest stays up, and your eyes stay locked on a point straight ahead at eye level.
As you descend, your knees will travel forward over your toes. That’s normal and necessary. Don’t try to keep your shins completely vertical unless you’re doing a box squat. Let your hips drop between your knees as you reach depth. You should feel tension building in your glutes, quads, and hamstrings. Once you hit your target depth (ideally knees bent past 90 degrees while keeping form), it’s time to drive back up. Fire your glutes and leg muscles. Push the ground away. Keep your brace, keep your chest up, and drive with your legs, not your back. The bar path should stay vertical over the middle of your foot.
Key descent and ascent cues:
- Start with simultaneous hip sit back and knee break
- Keep vertical torso, don’t exaggerate the hip hinge
- Keep feet flat, weight spread evenly, then drive through heels
- Descend as far as you can while keeping neutral spine and upright posture
- Drive up with leg and glute power, chest up, brace held
- Bar stays over midfoot throughout the rep
Common Barbell Squat Mistakes and How to Fix Them Safely
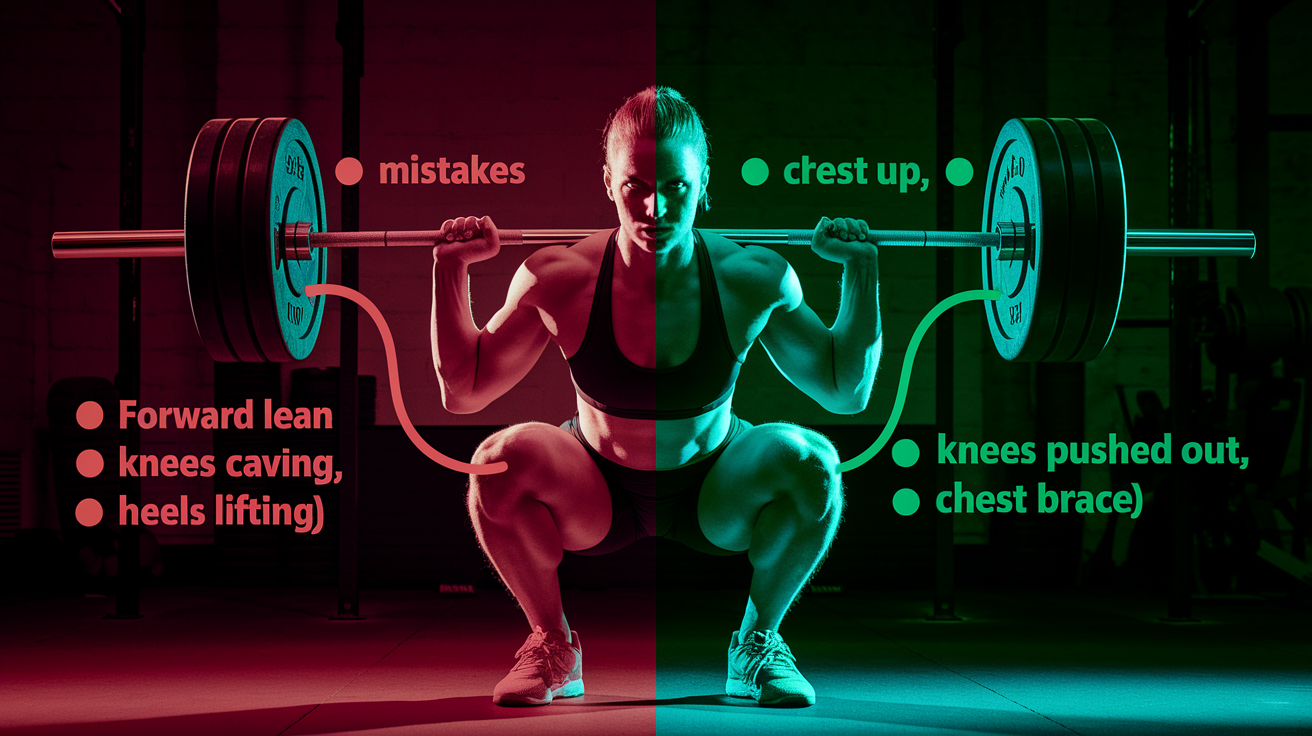
Most squat breakdowns happen because one part of the setup was skipped or done poorly. A weak unrack, a loose brace, or improper rack height all create instability before you even start the rep. Once the bar’s moving, the most common errors are excessive forward lean, collapsing chest, knees caving inward, and heels lifting off the floor. These aren’t just technique problems. They increase injury risk, especially under heavier loads.
Small mistakes with light weight cause small problems. Big mistakes with big weight cause injuries. That’s why you drill the checklist with just the bar or light load until it’s automatic. Here’s how to spot and fix the most frequent errors:
| Problem | Likely Cause | Quick Fix |
|---|---|---|
| Heels lifting off the floor | Weight shifted too far forward, weak ankle mobility, or chest dropping | Keep chest up, push through heels, improve ankle mobility with stretches and tempo squats |
| Excessive torso lean (looks like a “good morning”) | Weak brace, insufficient core strength, or hips rising faster than shoulders | Strengthen your brace, lighten the load, focus on driving chest and hips up together |
| Knees collapsing inward (valgus) | Weak glutes, poor trunk stability, or stance too narrow | Widen stance slightly, cue “push knees out,” add glute activation drills to warm up |
| Rounded upper back or collapsing chest | Poor bar placement, weak upper back, or insufficient lat tension | Use “scratch your rib cage” cue, strengthen upper back with rows and shrugs, adjust bar position |
| Unstable unrack or walkout | Rack height too high or too low, or poor pre-lift brace | Set bar at mid-chest height, brace hard before unracking, use minimal three step walkout |
Warm Up, Mobility Drills, and Activation Exercises for a Safer Squat

A good warm up prepares your joints, activates the right muscles, and gives you a few practice reps to dial in your technique. Start with five to ten minutes of light movement to raise your core temperature. Then move into mobility work for your hips and ankles, the two joints that limit squat depth for most people. Finally, do a few sets of unloaded or lightly loaded squat reps to rehearse your setup and bracing pattern.
Beginners should practice the movement with just the bar or even bodyweight squats before adding load. This builds the motor pattern and lets you feel what correct alignment and tension should be like. As you progress, your warm up gets shorter, but you should never skip it entirely. Even advanced lifters benefit from a structured warm up that primes movement quality and cuts down on injury risk.
Essential mobility and activation drills:
- Hip 90/90 stretch – Improves internal and external hip rotation, which directly affects squat depth and knee tracking.
- Ankle dorsiflexion stretch – Use a wall or elevated surface to gently push your knee forward over your toes while keeping your heel down.
- Glute bridges – Activate your glutes before you load the bar. Two sets of 10 to 15 reps.
- Bodyweight squat with pause – Hold the bottom position for three seconds to build stability and confidence at depth.
- Band pull aparts – Wake up your upper back and rear delts. Two sets of 15 reps before you touch the barbell.
Programming Squats in Full Body Routines: Fatigue, Exercise Order, and Frequency

Squats are high demand. They tax your muscles, your nervous system, and your joints. In a full body routine, you need to manage fatigue carefully so squats don’t wreck your ability to finish the rest of the session. Exercise order matters. Deadlifts create high systemic fatigue, so if you’re doing both squats and deadlifts in the same session, consider which one is your priority that day and do it first. The other can be done at lighter load or lower volume.
You can use squats in three distinct ways depending on your training goal for that session. Max effort work means heavy sets of one to five reps, focused on building absolute strength. Dynamic effort work uses lighter loads (often with accommodating resistance like bands or chains) for speed and explosive power. Repeated effort work is moderate to high volume at moderate intensity, used to build muscle and work capacity. Most full body programs rotate through these emphases across the week or training block.
Frequency depends on your recovery capacity and the overall volume of your program. Two to three squat sessions per week is common in full body templates. If you’re squatting three times a week, vary the intensity and volume. One session might be heavy and low rep, another might focus on speed, and the third could be higher rep accessory work. Walkout practice (taking the bar out of the rack and holding it in your squat stance for a few seconds) can improve stability and confidence under heavier loads, especially if you don’t have access to a monolift.
Programming rules for full body squat work:
- Do your priority lift first in the session when you’re fresh.
- If squatting and deadlifting in the same session, reduce volume or intensity on one of them.
- Rotate max effort, dynamic effort, and repeated effort emphases across the week to manage fatigue.
- Include one lighter, higher rep squat session each week to build work capacity and reinforce technique under less stress.
Squat Variations and Regression Options for Different Experience Levels
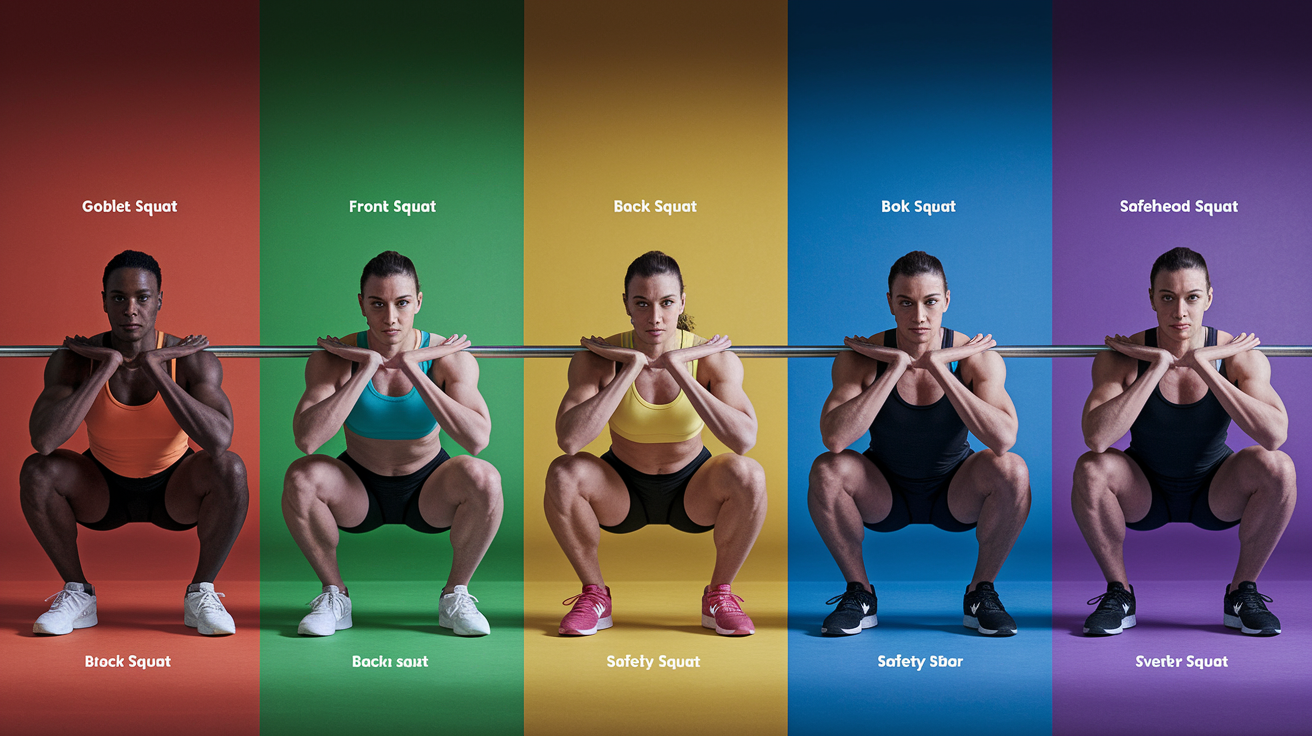
Over 40 squat variations exist, and each one shifts emphasis slightly or removes a limiting factor. If you’re new to barbell training, start with goblet squats or bodyweight squats. Goblet squats teach you to stay upright and brace your core while holding a dumbbell or kettlebell vertically at chest height. They’re self-limiting. You can’t load them heavy enough to hurt yourself before your technique breaks down, which makes them ideal for learning.
Box squats are commonly used in dynamic effort training. You descend until you sit briefly on a box set at or just below parallel, then drive back up. The pause removes the stretch reflex, so you have to generate force from a dead stop. This builds starting strength and teaches you to keep tension at depth. Front squats place the bar across the front of your shoulders, which forces a more upright torso and shifts more load to your quads. They’re harder on your wrists and upper back but excellent for building posture and core strength. Overhead squats require holding a barbell overhead with straight arms while you squat. They demand excellent mobility, balance, and core stability, so they’re better used as an assessment or accessory movement than a primary strength builder.
Useful regressions and progressions:
- Bodyweight squat – Master the movement pattern before adding load.
- Goblet squat – Learn bracing and upright torso position with a manageable load.
- Box squat – Build starting strength and confidence at depth with a controlled pause.
- Front squat – Improve torso position and quad development. Easier on the lower back for some lifters.
- Safety squat bar (SSB) – Reduces shoulder and wrist strain while keeping a similar movement pattern to back squats.
- Barbell back squat with bands or chains – Add accommodating resistance to build explosive strength and work through sticking points.
Final Words
In the action, you now have a simple, step-by-step technique checklist for safe barbell squat in full body routines: pre-lift checks, stance and foot cues, bar placement, breathing and bracing, descent/ascent mechanics, and programming notes.
Use exact cues like “scratch your rib cage with your elbows,” screw your feet into the floor, and 360-degree breathing. Run the 3 to 4 second final systems check before each rep. Practice unloaded walkouts and regressions until the pattern feels automatic.
Keep this checklist handy, add small progress each week, and favor technique over ego. You’ll build strength and confidence with less risk.
FAQ
Q: What is the 5-step pre-lift checklist for a safe barbell squat?
A: The 5-step pre-lift checklist is: unrack and three-step walkout, set a solid base, place the bar, brace the core, then do a 3–4 second green‑light systems check before descent.
Q: How should I set my squat stance and foot position?
A: Your squat stance and foot position should be shoulder-width or slightly wider, toes 10–15°, externally rotate to “screw” feet into the floor, weight balanced midfoot, knees tracking over toes, hips mobile for depth.
Q: Where should the bar sit, and how wide should my grip be?
A: Bar placement and grip should be chosen by bar position: high-bar on traps, low-bar on rear delts; grip as narrow as comfortable to tension upper back; keep wrists neutral and “scratch your rib cage with your elbows.”
Q: How do I breathe and brace correctly during the squat?
A: Correct breathing and bracing use 360-degree torso expansion to build intra‑abdominal pressure, hold the brace through the sticking point (Valsalva style), and exhale only after you’re past the top or at a safe break.
Q: How should I descend and ascend for safe squat mechanics?
A: Descent and ascent should start with a slight hip sit-back and knee bend together, keep a neutral torso, maintain brace, drive forcefully out of the hole, and avoid over‑hinging at the hips.
Q: What are the most common squat mistakes and quick fixes?
A: The most common squat mistakes are excessive torso lean, heels lifting, knee valgus, and bad unrack height; fix them with better bracing, push‑out knee cue, heel drive, proper rack setup, and walkout practice.
Q: What warm-up, mobility, and activation drills help a safer squat?
A: Useful warm-up and mobility drills include unloaded reps, banded ankle mobilities, hip CARs, glute bridges, and goblet squat reps to prime movement and improve ankle and hip range before loading.
Q: How should I program squats in full-body routines for fatigue management?
A: Programming squats in full-body routines means place them before high‑fatigue lifts when doing max-effort, use repeated-effort on lighter days, limit frequency to 2–4 weekly sessions based on recovery and volume.
Q: Which squat variations and regressions are best for different levels?
A: Squat variations and regressions include goblet and front squats for beginners, box squats for control, paused or low/high-bar for goals; choose goblet as the default regression and progress by loading and complexity.