

You don’t need a gym to build real tricep strength.
Bodyweight moves alone can do it.
Tuck your elbows 30 to 45 degrees and control the slow lowering so narrow push-ups, chair dips, and floor extensions light up all three tricep heads.
No equipment, quick progressions, and simple cues make every rep count.
Read on for form tips, household alternatives, and two short routines you can do in under 20 minutes.
Effective At‑Home Tricep Exercises You Can Start Right Now
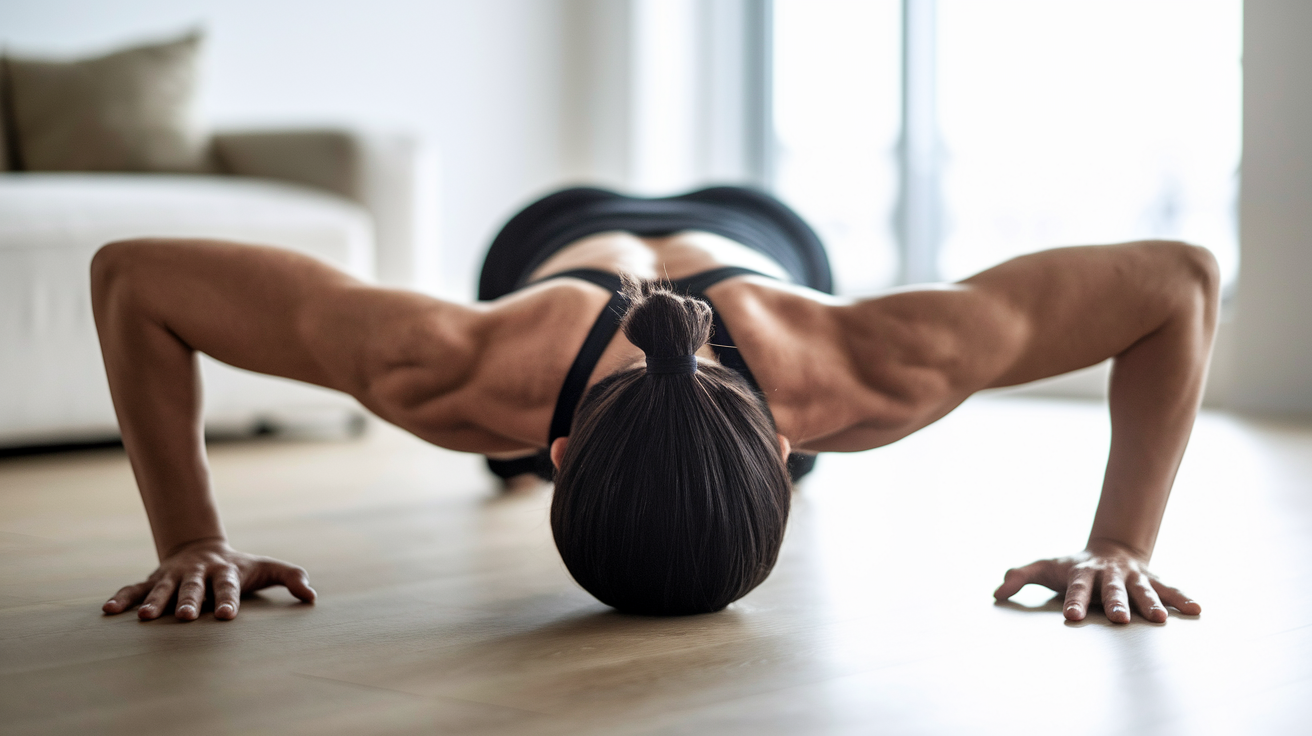
Bodyweight tricep exercises work. Your triceps respond to controlled pressing and extension movements that challenge your elbows through a full range. When you tuck your elbows at 30 to 45 degrees during push-up variations, you shift the load from your chest straight to your triceps and light up all three heads (lateral, long, medial). These movements use your own body weight as progressive resistance.
Elbow-tucked pressing angles are the foundation here. When your elbows stay close during narrow push-ups or dips, the long head of your triceps works harder because it starts from a stretched position. That stretch creates tension through a fuller range and builds the horseshoe shape most people want. The lateral and medial heads assist during the lockout and help stabilize your elbow under load.
These movements are ideal for beginners and busy at-home exercisers because they require zero equipment, they can be scaled up or down in seconds, and they fit into short training windows. You can do a complete tricep session in your living room in under 20 minutes. Every rep teaches you better elbow control and shoulder stability. Here are six bodyweight tricep exercises you can start today:
- Narrow push-ups: Do as many reps as possible with good form, keeping elbows tucked. Rest 45 seconds and repeat twice (total 3 rounds). AMRAP means you push to the edge of good form, not to muscle failure with sloppy reps.
- Diamond push-ups: Place your hands together under your chest to form a diamond shape. Lower slowly and press back to full lockout. This variation targets the lateral and medial heads harder than standard push-ups.
- Chair tricep dips: Sit on the edge of a sturdy chair, place your hands next to your hips with fingers pointing away, walk your feet out, and lower by bending your elbows. Press back to straight arms.
- Floor bow (bodyweight tricep extension): Start in a plank with your hands about 5 inches ahead of your face. Lock your upper arms and extend only at the elbows, lowering your forehead toward the floor and pressing back to the start.
- Push plank: Start in a high plank. Lower to your forearms one arm at a time, then press back to straight arms. Avoid shoulder shrugging by keeping your shoulder blades pulled down your back.
- L-sit (simple home variation): Sit on the floor with your legs straight and hands just outside your hips. Press through straight arms to lift your hips and legs off the floor. Bend your knees to make this easier or elevate your hands on yoga blocks to make it harder.
Mastering Tricep Technique at Home (Form, Cues, and Bodyweight Mechanics)
Correct tricep mechanics matter more than the exercise you pick. You can do 100 diamond push-ups with flared elbows and feel your chest burn while your triceps stay quiet. Or you can do 15 slow reps with elbows tucked and a 3-second descent and feel every fiber of your triceps working.
The difference? Elbow angle, tempo, hand placement, and shoulder positioning. Those four factors shape tricep activation more than sets, reps, or how hard you push. Lock in technique before you chase numbers, because sloppy reps teach your nervous system bad patterns.
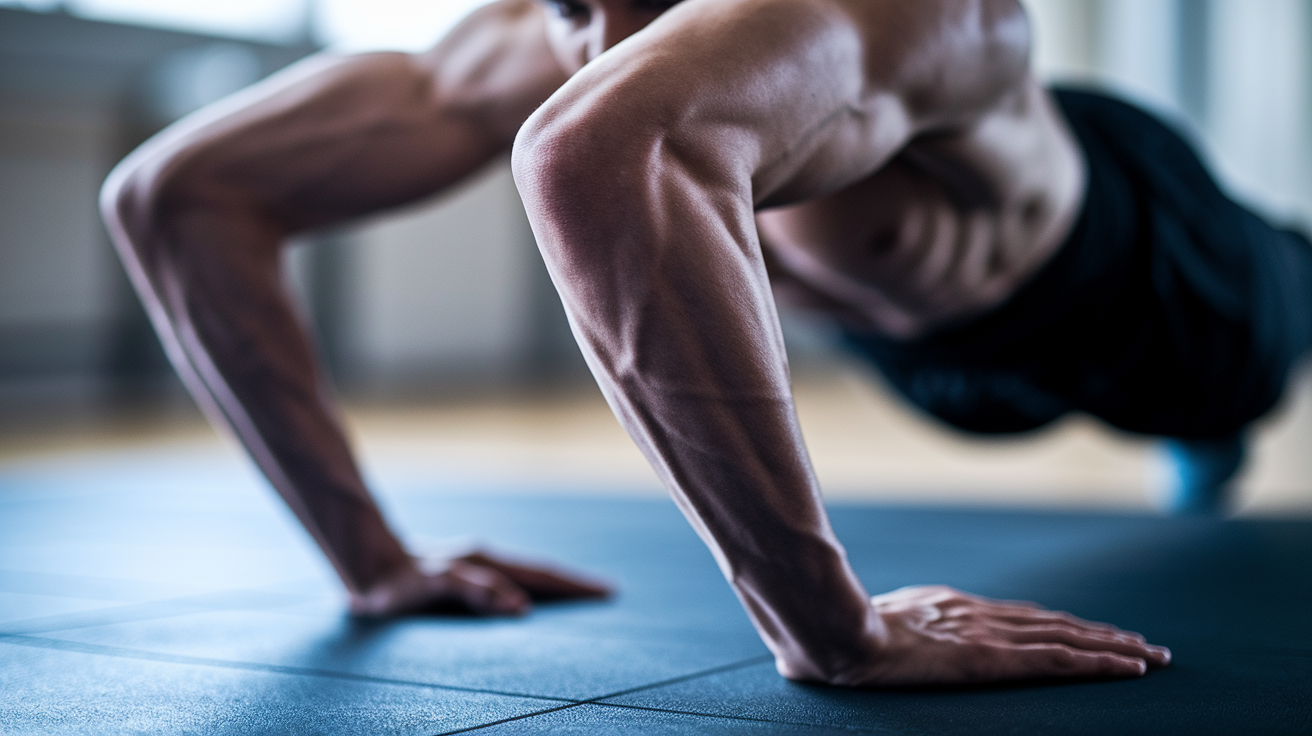
Elbow tracking is the first checkpoint. Your elbows should move backward along your ribs, not flare out to the sides. That 30 to 45 degree tuck keeps tension on the triceps and protects your shoulder joint. Hand placement matters too. For narrow push-ups, place your hands just inside shoulder width. For floor bows, hands sit about 5 inches ahead of your face so your elbows can fold under your body.
Wrist alignment follows hand placement. Keep your wrists stacked under your elbows at the bottom of each rep to avoid hyperextension. Core tension stabilizes your spine and ribcage so your arms can press with full force. Brace like you’re about to take a light punch to the stomach (firm, not stiff).
- Elbow tracking: Keep elbows moving backward at 30 to 45 degrees from your torso. Check your setup by pressing one rep and pausing at the bottom. Your elbows should point toward your feet, not out to the walls.
- Slow lowering (eccentric phase): Lower for 2 to 4 seconds on every rep. The slow descent builds time under tension and teaches elbow control. Speed up the press if you want, but never rush the lowering phase.
- Wrist and hand alignment: Hands stack under elbows at the bottom position. For push-ups, fingers point forward or slightly out. For dips, fingers point away from your body. For floor bows, fingertips point forward with palms flat.
- Core and shoulder stability: Maintain scapular depression (shoulder blades pulled down, not shrugged toward your ears) and a firm core brace throughout every movement. Shoulders and core stability allow your triceps to do the pushing work without compensation.
Minimal‑Equipment Tricep Training Using Dumbbells and Bands
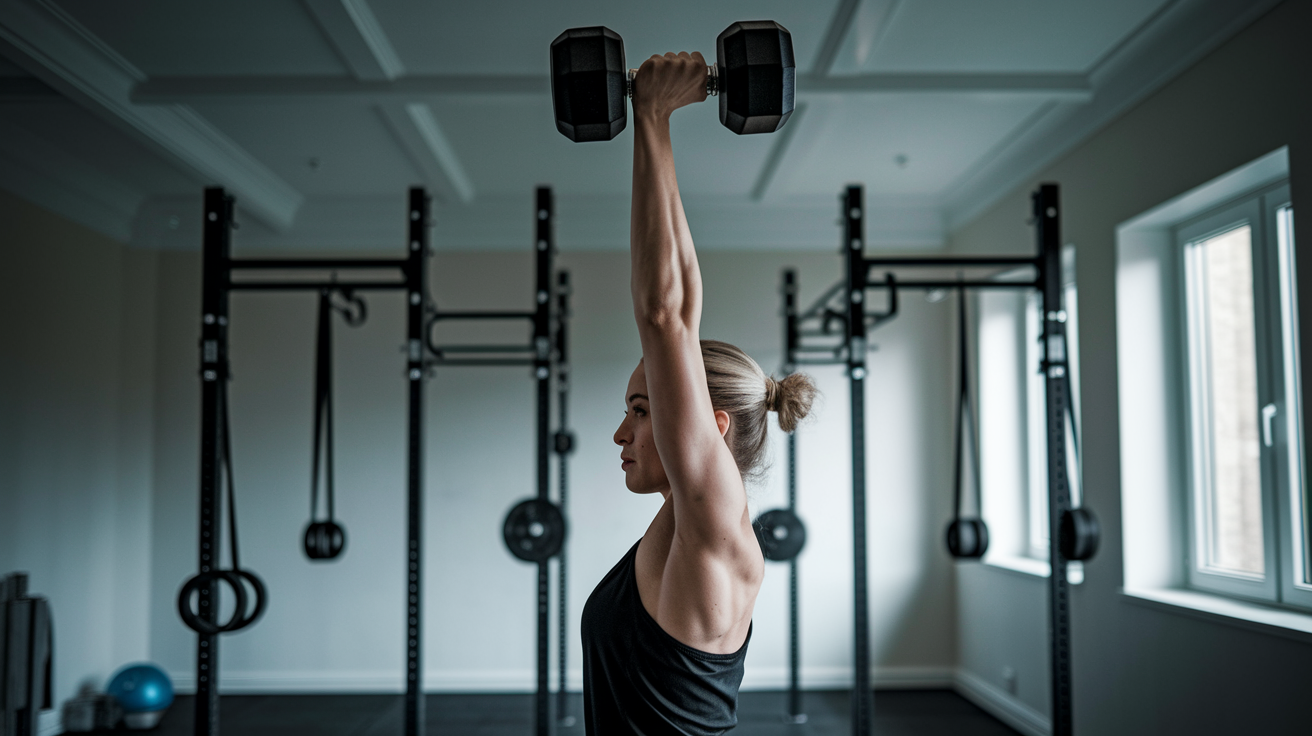
Bands and dumbbells improve loading and progression when bodyweight exercises start feeling too easy or when you want to isolate one tricep head at a time. A single dumbbell or a pair of resistance bands lets you add external load, control the resistance curve, and track measurable weight increases week to week.
Dumbbells create consistent resistance through the full range of motion. Bands increase resistance as you extend your arm toward lockout. Both tools cost less than a month of gym membership and fit under your bed or in a closet. One 20-pound dumbbell and two resistance bands give you enough tricep training options for years of progress.
Proper elbow positioning for overhead extensions and kickbacks is what makes or breaks these movements. For overhead tricep extensions, keep your elbows tight to your ears and your upper arms vertical. Only your forearms move. Lock your upper arm in place and extend at the elbow until your arm is straight overhead.
For kickbacks, hinge at your hips until your torso is nearly parallel to the floor. Your upper arm stays in line with your torso, elbow near your ribs. Extend your forearm behind you and squeeze hard at lockout. If your upper arm swings during kickbacks, the movement becomes a shoulder exercise instead of a tricep exercise.
Anchoring resistance bands safely at home takes one minute of setup and protects you from band snapback or anchor failure. Loop the band around a stable object that won’t move (a heavy couch leg, a squat rack upright, or a door anchor inserted into a closed door). For overhead extensions, anchor the band low (around your ankles or under your feet). For pressdowns, anchor the band high (top of a door frame or overhead beam).
Test the anchor by pulling lightly before you start your set. Never anchor bands to lightweight furniture, and always inspect the band for tears or worn spots before you train.
| Exercise | Sets/Reps | Equipment |
|---|---|---|
| Dumbbell Kickback | 4 sets × 12 reps | One or two dumbbells (8–20 lbs each) |
| Overhead Tricep Extension | 3 sets × 12 reps | Single dumbbell (10–30 lbs) or resistance band |
| Band Tricep Kickback | 4 sets × 15 reps (2-second hold at lockout) | Resistance band anchored low |
Household‑Item Tricep Exercises for Budget‑Friendly Training

Water bottles and wine bottles replace dumbbells when you’re starting out or traveling. A full 1-liter water bottle weighs about 2.2 pounds. A 1.5-liter bottle weighs roughly 3.3 pounds. A standard wine bottle filled with water or sand weighs between 2 and 3 pounds.
Use one bottle in each hand for kickbacks or hold one bottle with both hands for overhead extensions. The narrow grip on a bottle handle works fine for light tricep isolation. The first time I did overhead extensions with a wine bottle, I felt every rep just as much as I did with my 15-pound dumbbell.
A backpack loaded with books turns bodyweight dips and push-ups into weighted progressions. Fill a backpack with textbooks, canned goods, or water bottles until you reach 10 to 20 pounds. Wear it on your back for dips or push-ups. Adjust the straps tight so the load doesn’t shift mid-set. This setup is safe, cheap, and adjustable in 1-pound increments. You can add one book per week and track your progress just like you would with a weight vest.
- Water bottles (1 to 2 liters): Use as light dumbbells for kickbacks, overhead extensions, or single-arm holds. A pair of 2-liter bottles gives you about 8.8 pounds total.
- Wine bottles: Similar weight to 1.5-liter water bottles. Can be filled with sand for added weight and stability.
- Backpack loaded with books: Adjustable weight for dips and push-ups. Start with 10 pounds and add 2 pounds per week as you get stronger.
- Sturdy chair or bench: Use for tricep dips. Test the chair by sitting on the edge and rocking gently before you start your set. Avoid rolling chairs or lightweight plastic furniture.
- Yoga blocks or thick books: Elevate your hands for L-sits or modified floor bows. Two blocks stacked give you about 6 inches of height and make harder progressions accessible.
Structured At‑Home Tricep Workouts (10‑ and 20‑Minute Routines)

Time-efficient structure turns a handful of exercises into a complete training session. You don’t need an hour in the gym. You need a clear order, rest intervals that fit your fitness level, and a plan you can repeat twice a week.
The routines below use circuits and AMRAP sets to build tricep strength and endurance in short windows. Rest intervals are built in so you recover enough to keep good form without wasting time scrolling your phone between sets.
10-Minute Tricep Routine (Bodyweight Only):
- Narrow push-ups: AMRAP with elbows tucked. Rest 45 seconds. Repeat 2 more times (total 3 rounds).
- Chair tricep dips: 3 sets × 10 reps. Rest 30 seconds between sets.
- Push plank: 3 rounds × 30 seconds. Lower to forearms and press back to straight arms continuously. Rest 30 seconds between rounds.
- Floor bow (bodyweight tricep extension): 3 sets × 8 reps. Rest 45 seconds.
20-Minute Tricep Routine (Minimal Equipment):
- Overhead tricep extension (single dumbbell or band): 3 sets × 12 reps. Rest 60 seconds.
- Floor bow + Chair dips (superset): 3 rounds. Perform 10 floor bows, then immediately do 10 chair dips with no rest between movements. Rest 60 seconds after dips.
- Tricep kickbacks (dumbbell or band): 3 sets × 15 reps each arm. Rest 45 seconds.
- Push plank: 2 rounds × 45 seconds. Rest 30 seconds.
- L-sit hold (knees bent or straight legs): 2 rounds × 20 seconds. Rest 60 seconds.
Tricep Progressions, Regressions, and Progressive Overload at Home
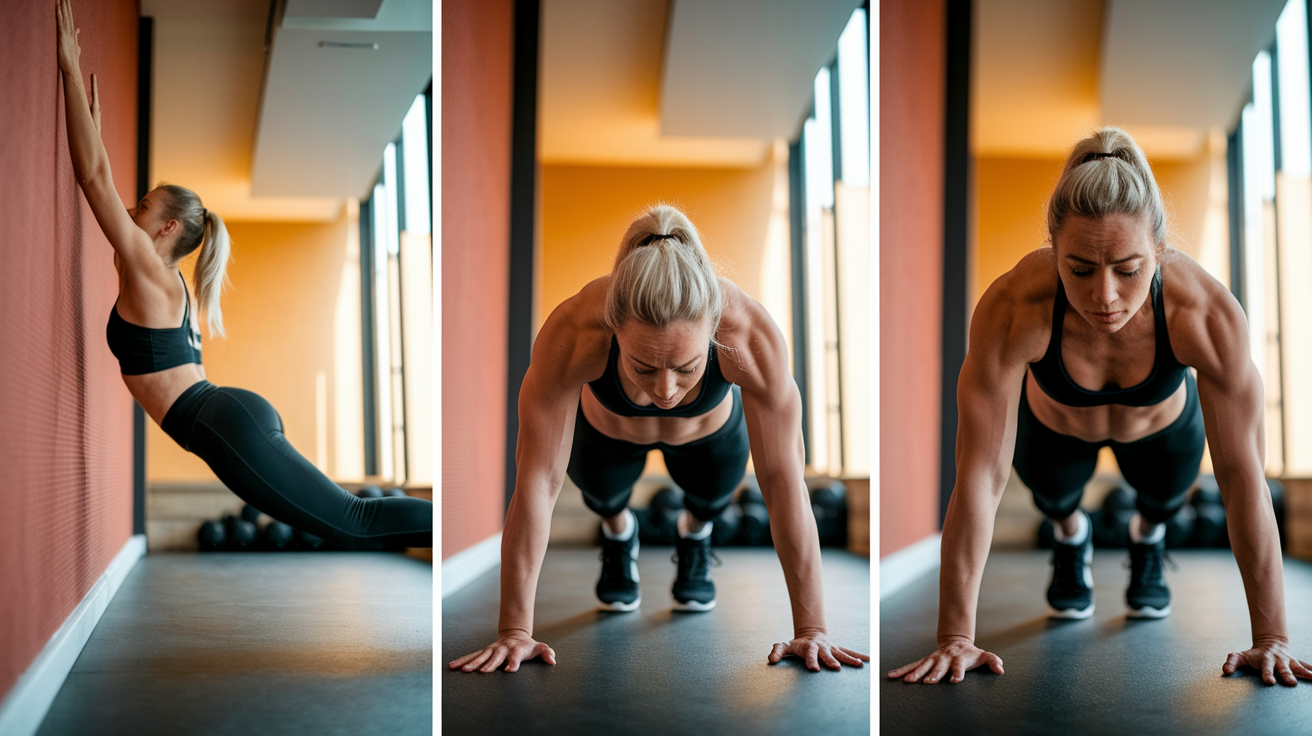
Beginner regressions make every exercise accessible on day one. If you can’t do a full narrow push-up, start with wall push-ups. Stand arm’s length from a wall, place your hands on the wall just inside shoulder width, and press. When wall push-ups feel easy, move to an elevated surface like a countertop or sturdy table.
Lower the surface height every week until you’re doing push-ups from the floor. For dips, keep your feet under your knees to reduce the load on your triceps. Bent-knee dips let you build strength and confidence before you straighten your legs. Start where you are. Every rep with good form is progress, even if it’s against a wall.
Intermediate progressions add sets, slow the tempo, or increase time under tension. Once you can do 3 sets of 12 narrow push-ups with good form, add a fourth set or slow your descent to 3 seconds per rep. For dips, straighten your legs to increase the load. For overhead extensions, hold the bottom position for 2 seconds before you press back to lockout. These tempo adjustments create new stimulus without adding equipment.
Advanced progressions introduce external load, harder leverage, or eccentric-only reps. Elevate your feet for push-ups. Wear a loaded backpack for dips. Perform eccentric-only push-ups by lowering for 4 seconds and then dropping to your knees to reset at the top. For L-sits, elevate your hands on yoga blocks and lift your hips higher.
Add one progression every 2 weeks and track the change in your training log.
- Add reps first: Increase reps by 1 or 2 each week until you reach the top of the prescribed range (e.g., 12 to 15 reps).
- Then add sets: Once you hit 15 reps per set, add a fourth or fifth set instead of chasing 20 reps per set.
- Slow the eccentric: Lower for 3 to 4 seconds on every rep. This doubles time under tension and builds strength in the stretched position.
- Add external load: Use a backpack, dumbbell, or band to increase resistance by 5 to 10% each week.
- Reduce rest intervals: Drop rest from 60 seconds to 45 seconds between sets to increase density and conditioning demand.
Elbow‑Friendly and Injury‑Aware Tricep Training at Home

Elbows flare when your hands are too wide or when you rush the descent and lose control. That flare shifts load to your shoulder joint and increases stress on your elbow tendons. Prevent pain by tucking your elbows 30 to 45 degrees on every pressing movement and keeping your descent slow and controlled.
If you feel sharp pain in your elbow during push-ups or dips, stop the set and check your elbow angle. A dull ache in the muscle is normal. A sharp joint pain is a red flag.
Safer isometric and short-range options let you train your triceps when full-range pressing hurts. Isometric holds at mid-range (elbows bent 90 degrees) build strength without moving through painful ranges. Modified tricep planks on a wall reduce joint stress while keeping your triceps engaged.
Straight-arm band pulldowns use minimal elbow movement and load the long head of the triceps through shoulder extension instead of elbow extension. These substitutions keep you training while you recover.
- Modified tricep plank (wall version): Place your fists on a wall at shoulder height, walk your feet back until your body is at a 45-degree angle, and hold for 30 seconds. Repeat 4 times with 60 seconds rest. This isometric hold builds tricep endurance with almost no elbow stress.
- Straight-arm band pulldown: Anchor a band high, hinge at your hips, and pull the band down to your hip pockets with straight arms. Your elbows barely bend. This movement loads the long head of the triceps through shoulder extension and is safe when elbow extension hurts.
- Shortened-range dips: Lower only halfway (elbows bent 45 degrees instead of 90 degrees) and press back to lockout. You still build strength in the less painful upper half of the range while avoiding the deep stretch that triggers pain.
Warm‑Up, Mobility, and Post‑Workout Stretching for Tricep Training

A 5-minute upper-body warm-up prepares your joints, raises your core temperature, and activates the muscles you’re about to load. Start with arm circles (10 forward, 10 backward) to mobilize your shoulders. Follow with band pull-aparts (15 reps with a light band) to wake up your rear delts and scapular stabilizers.
Finish with 10 slow cat-cow stretches to mobilize your thoracic spine and 10 downward dog shoulder taps to activate your core and shoulders under load. Your warm-up doesn’t need to be complicated. It just needs to move the joints you’re about to use and raise your heart rate a little.
Post-workout stretching improves recovery and reduces soreness over the next 24 to 48 hours. Hold each stretch for 30 seconds and breathe slowly. The kneeling bench stretch opens your chest and stretches the long head of your triceps. Sit on your heels, place your hands on a low bench behind you, and lean your hips forward.
The cross-body stretch isolates each tricep. Reach one arm across your chest, bend the elbow, and use your opposite hand to gently pull your elbow toward your shoulder. Repeat on both sides.
- Arm circles: 10 reps forward, 10 reps backward. Small circles to start, then larger circles to open your shoulder range.
- Band pull-aparts: 15 reps with a light resistance band. Pull the band apart at chest height, squeezing your shoulder blades together.
- Cat-cow stretch: 10 slow reps. Mobilizes your thoracic spine and prepares your core for plank-based tricep movements.
- Downward dog shoulder taps: 10 reps (5 per side). Start in downward dog, lift one hand, tap the opposite shoulder, and return. This drill activates shoulders, core, and triceps under bodyweight load.
A Simple Weekly Tricep Training Plan for Home Workouts

Two to three tricep sessions per week with 48 to 72 hours of recovery between sessions is the sweet spot for most home exercisers. More frequency than that increases injury risk without adding much benefit unless you’re an advanced lifter.
Each session should include 2 to 4 exercises: one pressing movement (narrow push-ups or dips) and one or two isolation movements (floor bows, kickbacks, or overhead extensions). Mixing pressing and isolation in the same workout trains all three tricep heads and builds both strength and endurance.
Schedule your tricep workouts on the same days you train chest or shoulders if you’re following a push/pull/legs split. Your triceps assist in all pressing movements, so grouping them together on push day allows several full recovery days before your next upper-body session.
If you train total-body or upper/lower, place tricep-focused work at the end of your upper-body sessions so fatigue doesn’t limit your compound lifts.
| Day | Workout Focus | Exercises |
|---|---|---|
| Monday | Triceps + Push | Narrow push-ups (3×AMRAP), Chair dips (3×10), Floor bow (3×8) |
| Thursday | Triceps + Isolation | Overhead extension (3×12), Kickbacks (3×15), Push plank (3×30s) |
| Sunday (optional) | Light Triceps Burnout | Diamond push-ups (2×AMRAP), L-sit (2×20s) |
Tracking Your At‑Home Tricep Progress

Simple methods of tracking progress keep you accountable and show you when it’s time to add load, reps, or sets. You don’t need a fancy app. A notebook or a notes app on your phone works fine.
Write down the date, the exercises you did, the sets and reps you completed, and any notes about how the workout felt. Track one metric per workout: reps completed, total time under tension, or load used. When you see that number go up week after week, you know you’re getting stronger.
I tracked my narrow push-ups in a notebook for six months. Watching my AMRAP reps climb from 8 to 22 was more motivating than any before-and-after photo.
- Reps and sets completed: Write down how many reps you hit in each set. Compare week to week. When you add 2 reps to your weakest set, that’s measurable progress.
- Load used (dumbbells, backpack weight, band resistance): Track the exact weight or band color. Increase by the smallest increment possible (1 to 2 pounds or one lighter band) every 1 to 2 weeks.
- Time under tension: For isometric holds (L-sit, tricep plank), track total seconds. For slow eccentrics, note your tempo (e.g., “3-second descent”).
- Form check videos: Record one set every 2 weeks from a side angle. Watch for elbow flare, shoulder shrug, or incomplete lockout. Comparing videos over 8 weeks shows technique improvements you can’t feel during the set.
Final Words
Start with the basics: bodyweight moves like narrow and diamond push-ups, chair dips, floor bows, planks, and L-sits. Use the form cues: elbows tucked 30-45°, slow eccentrics, and core tightness to target all three tricep heads safely.
Add simple gear when you’re ready: bands, dumbbells, or household items for extra load. Follow the 10- and 20-minute templates, the weekly plan, and the progression ladder to keep improving.
Stick with these at home tricep workouts. Small, steady steps build real strength.
FAQ
Q: How do I build my triceps at home without weights?
A: Building triceps at home without weights is possible with bodyweight moves like narrow and diamond push-ups, chair dips, floor extensions, push planks, and L-sits. Progress with reps, tempo, elevation, or a loaded backpack 2–3x weekly.
Q: Can I build triceps without weights?
A: You can build triceps without weights using focused bodyweight work, tempo control, and progressive challenges (elevate feet, slower eccentrics, more reps). Consistency and small weekly overloads drive growth and strength.
Q: Do triceps help with throwing?
A: Triceps help with throwing by extending the elbow during acceleration and follow-through, supplying power and stability. Strong triceps improve ball velocity, control, and fatigue resistance during repeated throws.
Q: What muscle makes up 70% of your arm?
A: The triceps brachii makes up about 70% of the upper-arm muscle mass, acting as the arm’s largest muscle and the main driver of elbow extension and pushing strength.