

Think you need heavy dumbbells to build muscle fast? Think again.
Resistance bands let you build real strength quickly at home with just one long loop and 15 to 20 minutes.
You’ll hit every major muscle, raise your heart rate, and actually see progress without hauling weights.
This intro points you to a short full-body circuit, how to pick bands, and the form cues that keep you safe.
Want a routine you can repeat and track? Keep reading to start the quick, effective band workout today.
Quick Full-Body Resistance Band Workout You Can Start Today

You don’t need much time or space to get a solid full-body resistance band workout done. A single long loop band and 15 to 20 minutes will hit every major muscle group, build strength, and get your heart rate up. Works well before breakfast, during a lunch break, or squeezed between back-to-back meetings.
The 8-Exercise Full-Body Circuit
-
Band Squat – Stand on the band with feet shoulder-width apart, handles at shoulders, sit back until thighs are parallel, drive through heels to stand. 3 sets of 12–15 reps with medium tension.
-
Bent-Over Row – Step on the band, hinge forward with a flat back, pull handles to your ribs with elbows back, squeeze shoulder blades at the top. 3 sets of 12–15 reps.
-
Glute Bridge – Lie on your back, wrap the band across your hips and anchor under your shoulders or upper back, drive hips up, hold 2 seconds at the top. 3 sets of 15 reps with medium to heavy tension.
-
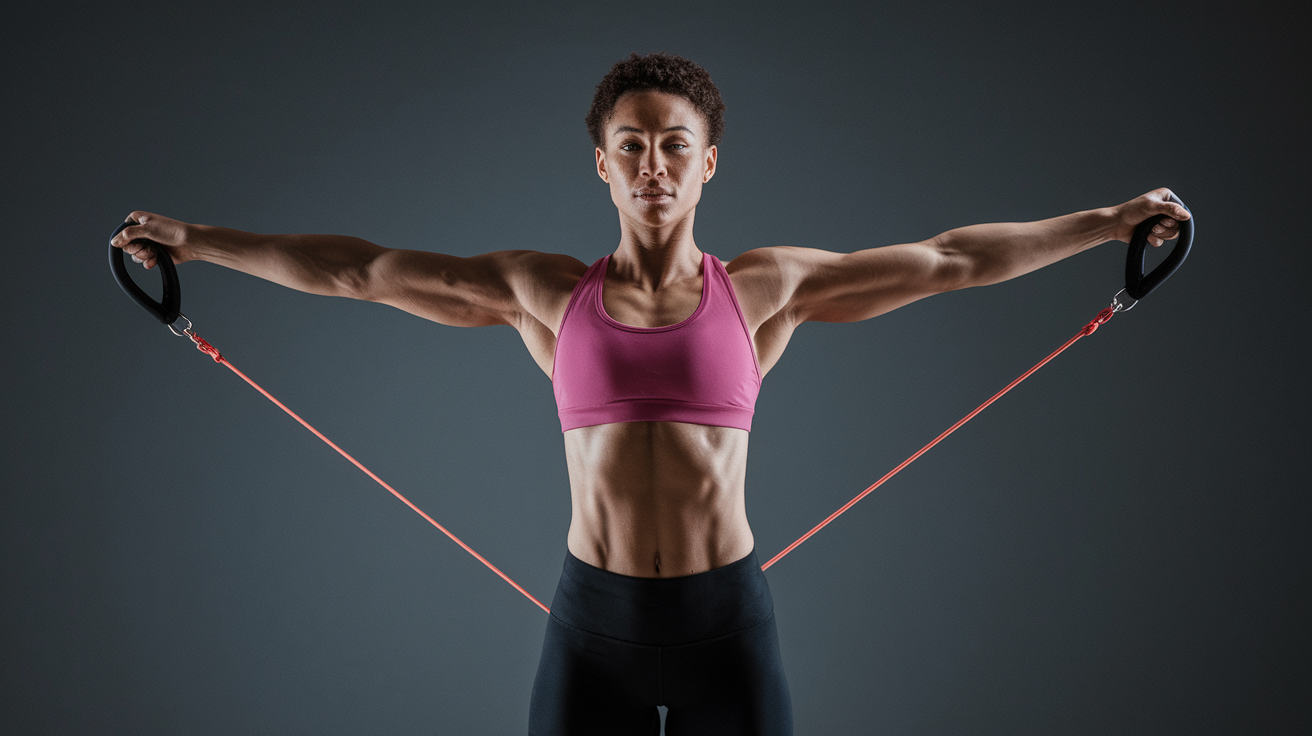
Overhead Shoulder Press – Stand on the band, handles at shoulder height, press straight overhead until arms are fully extended, lower under control. 3 sets of 10–12 reps.
-
Biceps Curl – Stand on the band, handles at your sides with palms forward, curl to shoulders keeping elbows pinned to your ribs. 3 sets of 12–15 reps with light to medium tension.
-
Lateral Band Walk – Loop a mini band around your thighs just above the knees, take 10 side steps in each direction while staying in a slight squat. 2 sets per side.
-
Pallof Press (Core Anti-Rotation) – Anchor the band at chest height, hold both handles at your sternum, press straight out in front of you resisting rotation, return. 3 sets of 10 reps per side.
-
Banded Push-Up – Wrap the band across your shoulder blades and hold the ends under your palms, perform a controlled push-up with the band adding resistance at the top. 3 sets of 8–12 reps.
Run through the circuit 1 to 3 times depending on your schedule. Rest 45 to 60 seconds between exercises and 90 seconds between full rounds. One round takes about 12 minutes, two rounds give you a solid 20-minute session, and three rounds push close to 30 minutes with real metabolic demand. Keep tension smooth and controlled on every rep, especially the lowering phase, to get more muscle engagement and cut down injury risk.
Choosing the Right Resistance Bands for Strength Training

Bands come in several formats, each with different advantages depending on what exercises you’re doing and what strength goals you’re after. Understanding the options helps you build a small, versatile home gym that fits in a drawer and travels anywhere.
Common Band Types
Loop Bands (Long Continuous Loops) – Usually 40 to 50 inches around, these are the most versatile for full-body training. Use them for squats, deadlifts, rows, presses, and anchored movements. They come in progressive resistance levels, often color-coded from light (yellow or green) through extra heavy (black or purple).
Mini Loop Bands (Short Fabric or Latex Loops) – Smaller closed loops, typically 10 to 15 inches around, designed to wrap around thighs, ankles, or wrists. Really effective for glute activation, lateral walks, and lower-body stabilization work. Fabric versions resist rolling better than latex.
Tube Bands with Handles – Dense rubber tubes with plastic or foam handles attached. The handles offer a comfortable grip for chest presses, curls, and shoulder raises. Some models include door anchors or ankle straps for added exercise variety.
Figure-8 Bands – Two small loops connected by a short section of tubing, ideal for upper-body isolation work like lateral raises and chest flies. Compact and easy to pack.
Therapy Bands (Flat Sheets) – Thin, wide latex strips sold by the yard. Lightest resistance option, commonly used in physical therapy, rehab, stretching routines, and warm-ups before heavier training.
Resistance levels typically range from light (easiest to stretch, suited for warm-ups and smaller muscles like biceps and triceps) to extra heavy (hardest to stretch, used for lower-body moves like squats and glute bridges where you’ve got more overall strength). Start with a set of three bands covering light, medium, and heavy tensions so you can match resistance to the muscle group and exercise. Thicker bands and shorter lengths create higher resistance, so adjusting how much slack you leave when you anchor or step on a band is another way to fine-tune difficulty.
Proper Form and Safety Essentials

Good form with resistance bands starts with keeping a stable, braced core and neutral spine throughout each movement. Bands create variable tension that increases as you stretch them, which means the hardest part of the lift is often at full extension. Keep your shoulders down and back, not shrugged up toward your ears, and engage your abs like you’re about to take a light punch to the stomach. Firm, not stiff.
Control the eccentric phase of every rep. That means lowering, releasing, or returning to the start position slowly and deliberately rather than letting the band snap back. Slow eccentrics build more strength and cut down the risk of the band slipping out of your hand or off your foot and recoiling into your face or body. Always inspect your bands before use for nicks, tears, or worn spots, and replace any damaged equipment immediately.
Anchor points matter. When you loop a band around a sturdy post, door anchor, or heavy piece of furniture, pull gently first to confirm it won’t slip or break free mid-rep. Position anchors at the correct height for the exercise: chest level for rows and Pallof presses, low for squats and deadlifts, high for lat pulldowns. Never anchor a band to anything that could tip over or break.
Common Mistakes to Avoid
Letting the band pull you out of alignment (hips or shoulders rotating, back arching).
Starting with a band that’s already stretched to maximum tension, leaving no room for safe range of motion.
Skipping the warm-up or jumping straight into heavy resistance without rehearsing the movement pattern with lighter tension first.
Gripping handles or the band itself too loosely, especially on high-tension exercises like rows and presses.
Upper-Body Strength Exercises with Resistance Bands

Resistance bands deliver constant tension across the entire range of motion for chest, back, shoulder, and arm exercises, forcing stabilizer muscles to work harder than they would with free weights on a fixed path. Changing where you anchor the band, how wide your grip is, or how much pre-stretch you build into the setup all alter the difficulty and muscle emphasis.
6 Core Upper-Body Exercises
-
Band Chest Press – Anchor the band at mid-back height behind you, hold one handle in each hand at chest level, step forward to create tension, press straight out in front of you until arms are extended, return under control. 3 sets of 12–15 reps.
-
Bent-Over Lat Row – Stand on the center of the band, hinge at the hips with a flat back, pull handles to your lower ribs with elbows tight to your sides, squeeze your shoulder blades together at the top, pause 1 second. 3 sets of 12–15 reps.
-
Overhead Shoulder Press – Stand on the band, handles at shoulder height with palms facing forward, press straight up overhead until arms are fully extended, lower to shoulders. 3 sets of 10–12 reps with medium to heavy tension.
-
Biceps Curl – Stand on the band, hold handles with palms facing forward and elbows locked to your ribs, curl to shoulder height, lower slowly over 2 to 3 seconds. 3 sets of 12–15 reps.
-
Triceps Extension – Anchor the band overhead, face away from the anchor, hold one handle with both hands behind your head, extend your arms straight up while keeping elbows stationary, return. 3 sets of 10–12 reps.
-
Face Pull – Anchor the band at upper-chest height, hold both handles, step back to create tension, pull handles toward your face with elbows high and wide, squeeze shoulder blades together. 3 sets of 15 reps with light to medium tension.
To increase difficulty without buying new bands, shorten the effective length by wrapping the band once around your hand or foot, step farther from the anchor point, or switch to a narrower grip on the handles. To decrease difficulty, leave more slack in the band at the start position or move closer to the anchor. These small adjustments let you hit the target rep range with good form every session.
Lower-Body Strength Exercises with Resistance Bands

Bands add horizontal or vertical load to lower-body movements, boosting glute activation, quad engagement, and hamstring tension in ways that bodyweight-only exercises can’t match. Loop bands wrapped around your thighs force your glutes to work throughout lateral movements and squats, while standing on a long band during squats or deadlifts creates progressive resistance as you stand up.
6 Key Lower-Body Exercises
-
Band Squat – Stand on the center of the band with feet shoulder-width apart, hold handles at shoulder height, sit back and down until thighs are parallel to the floor, drive through your heels to stand. 3 sets of 12–15 reps with medium to heavy tension.
-
Glute Bridge – Lie on your back, wrap the band across your hips and anchor the ends under your shoulders or upper back, feet flat on the floor, drive hips toward the ceiling, hold 2 seconds at the top. 3 sets of 15 reps.
-
Lateral Band Walk – Place a mini loop band around your thighs just above the knees, lower into a quarter squat, take 10 controlled steps to the right, then 10 to the left. 3 sets per direction.
-
Single-Leg Kickback – Anchor the band low, loop one end around your right ankle, step back with tension, hinge slightly at the hips, extend your right leg straight back squeezing your glute, return. 3 sets of 12 reps per leg with light to medium tension.
-
Deadlift – Stand on the band with feet hip-width apart, hinge at the hips with a flat back, hold handles with arms straight, push your hips forward to stand tall, lower under control. 3 sets of 12–15 reps.
-
Split Squat – Stand on the band with your front foot, hold handles at shoulders, rear foot elevated on a low step or bench behind you, lower until front thigh is parallel, press back up. 3 sets of 10–12 reps per leg.
Adjust band tension by stepping wider apart on the band (more tension) or narrower (less tension), or by looping the band one extra time around your foot before gripping the handles. As you get stronger, switch to a heavier band or combine two bands for compound loading. For unilateral moves like kickbacks and split squats, the band naturally increases the stability demand on your core and standing leg, so even lighter resistance feels challenging.
Core Strengthening Routines Using Resistance Bands
Bands work really well for rotational, anti-rotation, and stabilization core exercises because they create continuous tension that your abs and obliques must resist in multiple planes of motion. Unlike crunches on the floor, band core work forces you to brace and control your torso against a pulling force, building functional strength that carries over to everyday lifting and athletic movement.
Anti-rotation exercises like the Pallof press teach your core to resist twisting, which protects your spine during asymmetrical loads. Anchor the band at chest height to your right, hold both handles at your sternum with arms bent, step away until there’s moderate tension, then press your hands straight out in front of you while keeping your torso square and still. The band will try to pull you toward the anchor. Your core’s job is to stay locked in place. Complete 3 sets of 10 reps per side.
4 Essential Band Core Exercises
-
Pallof Press – Anchor at chest height, hold handles at sternum, press straight out resisting rotation. 3 sets of 10 reps per side.
-
Kneeling Wood Chop – Anchor high and to the right, kneel on your left knee, pull the band diagonally down across your body to your left hip, return under control. 3 sets of 12 reps per side.
-
Standing Rotation – Anchor at chest height, hold handles with arms extended, rotate your torso away from the anchor keeping hips square, return. 3 sets of 12 reps per side.
-
Resisted Plank Pull – Anchor low, start in a plank with the band looped around one wrist, pull that hand to your ribs without rotating your hips, return, repeat. 3 sets of 8 reps per side or hold a static plank with band tension for 20–30 seconds per side.
Progressive Training Plans for Muscle Growth and Strength

Progressive overload is the process of gradually increasing the demand placed on your muscles over time. With resistance bands, that means adding more tension, more reps, more sets, slower tempos, or more complex movement patterns as your body adapts. Without progression, your muscles have no reason to grow stronger or bigger.
The simplest way to progress is to move from a light band to a medium band, then to a heavy band as exercises become easier. Another method is to increase your reps from 10 to 12 to 15 within the same band level before stepping up resistance. You can also add sets, moving from 2 sets per exercise to 3, or from 3 to 4 for key movements like squats and rows.
Tempo manipulation works well with bands. Slow down the eccentric (lowering or releasing) phase to 3 or 4 seconds instead of 1 or 2. That time under tension increases muscle damage and metabolic stress, both drivers of growth. Isometric holds at peak contraction, like holding the top of a glute bridge for 20 to 30 seconds, are another effective overload strategy that doesn’t require new equipment.
| Overload Method | Practical Example |
|---|---|
| Increase band resistance | Move from yellow (light) to red (medium) loop band for squats |
| Add reps or sets | Progress from 3 sets of 10 reps to 3 sets of 15 reps, then add a 4th set |
| Slow eccentric tempo | Lower for 3–4 seconds on rows, presses, and squats instead of 1–2 seconds |
| Unilateral variations | Switch from two-leg band squats to single-leg split squats or Bulgarian split squats |
Sample Weekly At-Home Resistance Band Training Schedules

A well-structured weekly plan balances training frequency, recovery, and muscle-group focus so you build strength without burning out or overtraining. Two to four resistance band sessions per week is enough for most people to see measurable progress in strength, muscle tone, and endurance.
3-Day Full-Body Plan (Beginner to Intermediate)
Monday – Full-body circuit: band squat, bent-over row, glute bridge, overhead press, biceps curl, lateral band walk, Pallof press. 2–3 rounds, 12–15 reps per exercise, 60 seconds rest between rounds.
Wednesday – Full-body circuit: deadlift, chest press, split squat (each leg), face pull, triceps extension, resisted plank pull. 2–3 rounds, 10–12 reps per exercise, 60 seconds rest.
Friday – Full-body circuit: band squat, lat row, single-leg kickback (each leg), shoulder press, wood chop (each side), glute bridge hold (20–30 seconds). 2–3 rounds, 12–15 reps, 60 seconds rest.
5-Day Upper/Lower Split Plan (Intermediate to Advanced)
Monday – Upper Body – Chest press, bent-over row, overhead press, biceps curl, triceps extension, face pull. 3 sets of 10–12 reps, 45–60 seconds rest between sets.
Tuesday – Lower Body – Band squat, deadlift, glute bridge, lateral band walk, split squat (each leg). 3 sets of 12–15 reps, 60 seconds rest.
Wednesday – Core & Mobility – Pallof press, wood chop, standing rotation, resisted plank pull, light stretching or yoga. 2–3 sets of 10–12 reps or 20–30 second holds.
Thursday – Upper Body – Repeat Monday’s upper session or swap in different angles (e.g., incline chest press if you can anchor high, single-arm rows).
Friday – Lower Body – Repeat Tuesday’s lower session, or add single-leg deadlifts and banded jump squats for power work. 3 sets, adjust reps based on exercise complexity.
Both plans assume 20 to 30 minutes per session. Rest at least one full day between sessions that hit the same muscle groups, and take one or two complete rest days each week for recovery and adaptation.
Final Words
Start with the quick full‑body circuit and the clear sets and reps. Pick bands that match your strength, learn the safe bracing and anchoring cues, and use the upper, lower, and core libraries to mix things up.
Follow the progression tips—more tension, extra reps, or slower tempo—as you get stronger. Use the sample weekly plans to fit training into real life.
Stick with these steps and you’ll build consistency. These efficient at-home strength workouts with resistance bands add real strength without the guesswork. Keep going—small wins add up.
FAQ
Q: What is a quick full‑body resistance band workout I can do at home?
A: The quick full‑body resistance band workout includes 8 moves—band squats, rows, overhead presses, glute bridges, deadlifts, lateral steps, core twists, and band pulls—done 2–3 sets of 12–15 reps with challenging tension.
Q: How do I choose the right resistance bands for strength training?
A: Choosing the right resistance bands means picking the style (loop, tube, figure‑8, therapy) and a tension that makes the last 2 reps hard, while keeping good form and safe anchors.
Q: What are the main types of resistance bands and how do they differ?
A: The main band types are loop (great for legs/glutes), tube (handles for presses), figure‑8 (short pulls), therapy (thin, light rehab), and mini‑bands (short loops for hip work); length and thickness change resistance.
Q: How should I match band tension to my goals?
A: Matching band tension means using light for mobility and endurance, medium for general strength, and heavy for strength gains—pick a band that makes the final reps difficult but doable with clean form.
Q: How do I run a resistance band circuit effectively?
A: Running a resistance band circuit means doing 1–3 rounds of the full set of exercises, resting 45–60 seconds between exercises, and choosing 2 rounds if you’re short on time or 3 for more challenge.
Q: What are the key form and safety tips for band training?
A: Key form and safety tips are maintain neutral spine and shoulder alignment, brace your core, control the band on the return, and secure anchors to prevent slipping or recoil injuries.
Q: What common mistakes should I avoid with resistance bands?
A: Common mistakes include using too little or too much tension, letting the band snap back, poor posture (rounded back), and anchoring bands insecurely or at the wrong angle.
Q: Which upper‑body resistance band exercises should I do and with what sets/reps?
A: The top upper‑body exercises are band chest press (3×10–12), lat row (3×10–12), shoulder press (3×8–12), biceps curl (3×10–15), triceps extension (3×10–15), and face pull (3×12–15).
Q: Which lower‑body resistance band exercises should I do and with what sets/reps?
A: The top lower‑body exercises are band squats (3×12–15), deadlifts (3×8–12), lateral band steps (3×12–20 steps), glute bridges (3×12–15), banded kickbacks (3×10–15), and split‑squat (3×8–12 each leg).
Q: What core exercises work well with bands and what are the reps/time targets?
A: Core band exercises include Pallof press (3×8–12 each side), resisted crunch (3×12–15), Russian twists with band (3×20 total), and anti‑rotation hold (3×20–40 seconds).
Q: How do I progress with resistance bands for muscle growth and strength?
A: Progress with resistance bands by increasing tension, adding reps, slowing the tempo (longer eccentrics), or choosing harder variations like single‑leg or single‑arm moves to keep gaining strength.
Q: What does a sample weekly at‑home band training schedule look like?
A: A 3‑day plan uses full‑body circuits Monday/Wednesday/Friday; a 5‑day plan splits upper/lower days with a core and mobility day—both include rest days and easy recovery sessions.