

Squats won’t build your glutes the way hip thrusts do.
The hip thrust puts your glutes under direct load while sparing your lower back, so you get strength and size without unnecessary stress.
This post shows exactly how to set up and perform the movement, common fixes, useful equipment choices, beginner-to-advanced variations, and clear progressions to get stronger week to week.
Read on if you want a simple, step-by-step plan to make your glutes stronger, fix weak points, and add measurable load safely.
Understanding the Hip Thrust and How to Perform It

The hip thrust drives hip extension by pushing your hips up against load while your upper back rests on a bench. It targets the glutes directly and brings in the hamstrings, glute medius, and core for stability. Unlike squats or deadlifts, the hip thrust isolates your glutes through a longer range without piling stress onto your spine. That makes it a strong choice for building posterior strength without trashing your lower back.
Setup and execution matter if you want your glutes doing the work instead of your lower back compensating. Bench height should sit around knee level when you’re on the floor. That puts your shoulder blades at the right contact point when you lean back. Keep your chin slightly tucked so your neck stays neutral, ribs pulled down to stop rib flare, shins vertical at the top, and drive through your heels instead of your toes. Finish each rep with full hip extension and a deliberate glute squeeze at the top. Don’t arch your lower back to get there.
Step-by-Step Execution:
- Position a flat bench against a wall or stable surface so it won’t slide.
- Sit on the floor with your upper back against the bench edge, knees bent, feet flat and about shoulder width apart.
- Roll or place the barbell (or dumbbell, or plate) across your hip crease. Use a pad, folded towel, or yoga mat if the bar digs in.
- Plant your feet so that when your hips are fully extended, your shins are close to vertical and your knees form about 90 degrees.
- Brace your core by taking a deep breath and tightening your abs like you’re about to get punched in the stomach.
- Drive through your heels and push your hips up until your thighs are parallel to the floor, forming a straight line from shoulders to knees.
- Squeeze your glutes hard at the top and hold for one to two seconds. Don’t let your lower back hyperextend.
- Lower your hips in a controlled motion until your glutes lightly touch the floor or hover just above, then repeat.
Focus on two cues: press through your heels and squeeze your glutes at the top. Keeping your chin tucked and ribs down prevents your spine from overextending and keeps the work in your glutes instead of shifting to your lower back.
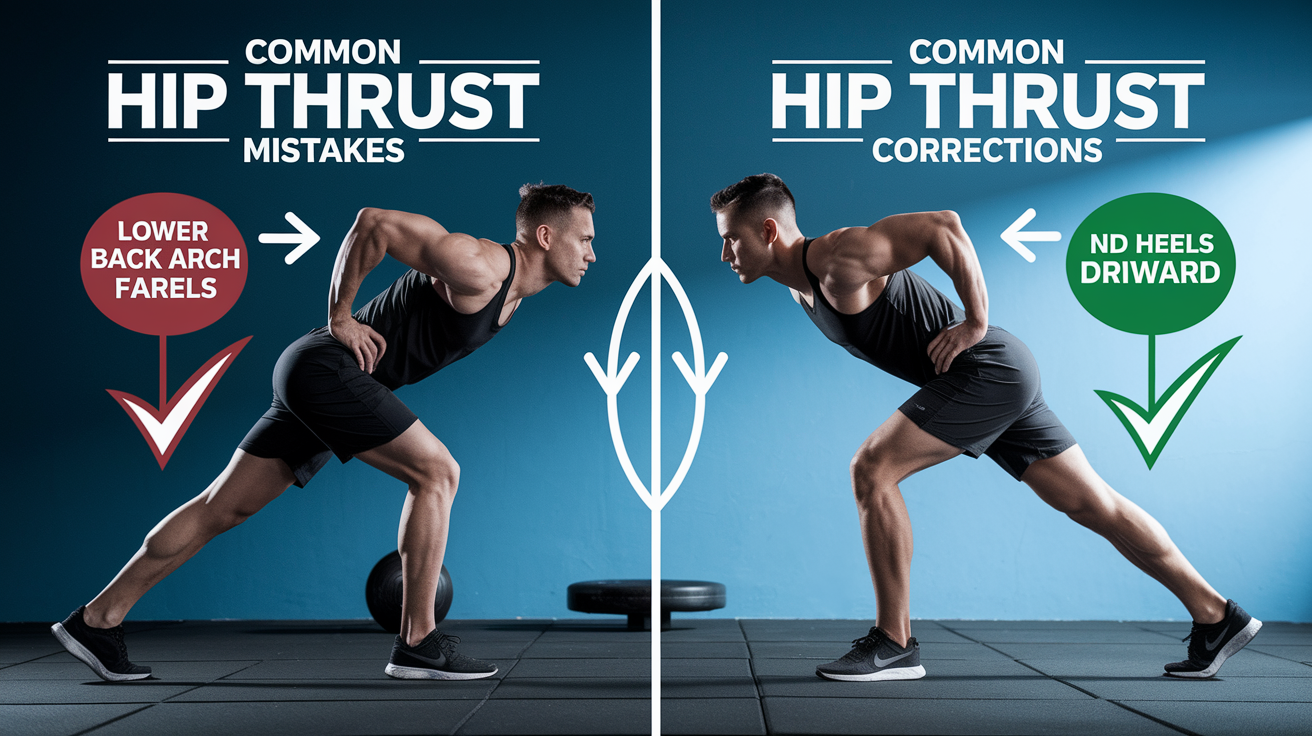
Common Mistakes and How to Fix Them

Small setup and execution errors can shift load away from the glutes and increase injury risk, especially in the lower back and knees. Fixing these mistakes keeps tension on the target muscles and makes each rep count.
Common Mistakes and Corrective Fixes:
• Overextending the lower back at the top. Pull your ribs down and tuck your chin slightly. Think about reaching your hips up rather than arching your spine backward.
• Feet placed too far forward. Adjust your foot position so your shins are close to vertical when hips are fully extended. Feet too far out shifts more work to the hamstrings and reduces glute activation.
• Feet too close to the bench. Move your feet forward until your knees form roughly 90 degrees at lockout. Feet too close biases the quads and limits glute range of motion.
• Rising onto the toes at the top. Keep your heels firmly planted and drive force through them. If you’re rolling onto your toes, your feet are likely too close or you’re hyperextending your back.
• Sliding off the bench during the lift. Make sure the bench is braced against a wall or heavy object. Position your shoulder blades on the bench edge, not your neck, and keep your upper back pressed into the pad throughout the rep.
• Not reaching full hip extension. Drive your hips all the way up until your thighs are parallel to the floor and your torso forms one line with your thighs. Partial reps leave glute strength on the table.
Reinforcing these corrections during warm-up sets builds the right motor pattern before adding heavy load. Check foot placement first, brace your core second, and prioritize the heel drive and glute squeeze cues on every single rep.
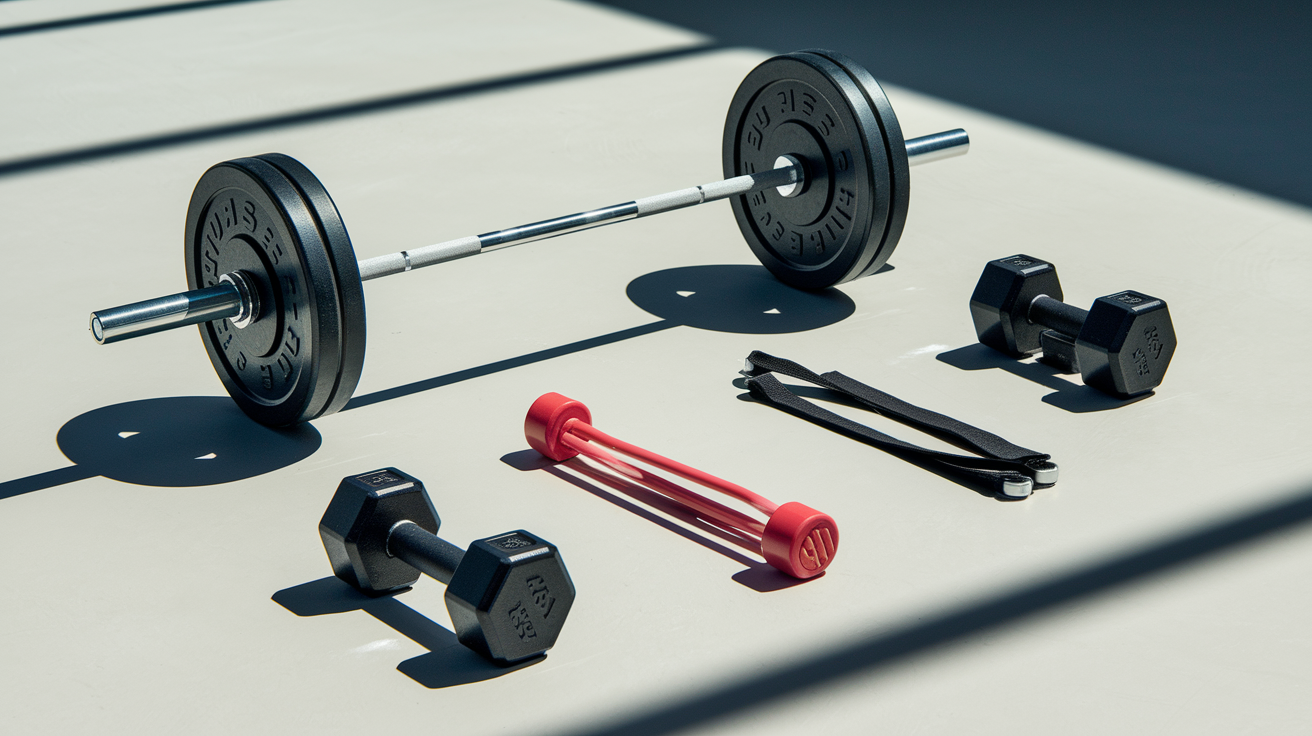
Equipment Options for Hip Thrusts

Hip thrusts can be loaded with barbells, dumbbells, weight plates, resistance bands, or specialized machines. Each option serves different training environments and experience levels. A standard barbell lets you load the heaviest weight and progress by adding small plates, making it the go-to choice for intermediate and advanced lifters chasing strength or size. Dumbbells and single weight plates work well for beginners or home setups with limited equipment. Simply rest the dumbbell or plate on your hip crease and stabilize it with your hands. Resistance bands looped above the knees or anchored under your feet add constant tension throughout the range and pair well with bodyweight or light load variations when you’re targeting glute activation and endurance.
Machines designed specifically for hip thrusts simplify setup by eliminating the need to roll a barbell over your legs or balance a dumbbell. Many models accept plate loading or integrate resistance bands for variable tension. Bench height matters regardless of load type. The bench should contact just below your shoulder blades when you’re in the starting position, typically around knee height when seated on the floor. If a standard flat bench feels too high or too low, adjust by using a plyo box, sturdy couch, or stacked mats until you find the height that lets your upper back stay stable and your hips move freely through full extension without your body sliding off.
Variations From Beginner to Advanced
Beginner Variations
Glute bridges are the simplest starting point. You lie flat on the floor with knees bent and feet planted, then drive your hips upward without using a bench. This shorter range of motion reduces the stability demand and lets you focus on the glute squeeze cue and proper foot placement before adding elevation or external load. Banded glute bridges add a resistance loop above the knees to increase lateral glute activation and teach you to keep your knees tracking outward, which carries over directly to the full hip thrust setup.
Intermediate Variations
Dumbbell hip thrusts introduce external load in a manageable form. Hold a single dumbbell on your hips and perform the standard bench-elevated movement, progressing from lighter weights up to the heaviest dumbbell available in your gym. Paused reps build time under tension and motor control by holding the top position for two to three seconds on every rep, forcing your glutes to stay engaged and preventing momentum from taking over. Both variations prepare you for heavier barbell loading and teach you to maintain tension and form when fatigue sets in.
Advanced Variations
Barbell hip thrusts with progressive loading form the core of advanced glute training. Once you can perform 12 to 15 clean reps with a given weight, add another five to ten pounds and drop back to six to eight reps, building back up over weeks. Single-leg hip thrusts eliminate the support of the opposite leg, doubling the demand on one glute and exposing strength imbalances. Keep the non-working leg extended at about 45 degrees and aim for three sets of eight to twelve reps per side. Heavy loading strategies for experienced lifters include lower rep sets in the three to six range with near maximal weight, often combined with tempo work or cluster sets to accumulate volume while maintaining peak force output.
Programming and Progression Strategies
Most glute-focused programs place hip thrusts in the six to twelve rep range to balance mechanical tension and metabolic stress, the two main drivers of muscle growth. Lower rep ranges (three to six) with heavier loads build absolute strength and are useful when your goal is to increase your one rep max or transfer hip extension power to sprints and jumps. Higher ranges (twelve to twenty) with moderate load emphasize muscular endurance and can serve as a finisher or warm-up protocol.
| Training Goal | Sets/Reps | Intensity Guidelines |
|---|---|---|
| Strength | 3–5 sets of 3–6 reps | Use load that makes the final rep challenging but clean; rest 2–3 minutes between sets |
| Hypertrophy (Muscle Growth) | 3–5 sets of 8–12 reps | Select weight where last rep is hard but form stays intact; rest 60–90 seconds between sets |
| Endurance / Activation | 2–3 sets of 15–20 reps | Lighter load; focus on tempo and glute squeeze; rest 30–60 seconds between sets |
Progressive overload (slowly doing a little more over time) is the core principle for long-term strength and size gains. Start by adding reps within your target range until you hit the top end. For example, working from eight reps up to twelve reps over two to three weeks. Then increase the load by five to ten pounds and drop back to the bottom of the range. Tempo changes also drive progress. Slowing the lowering phase to three seconds or pausing at the top for two seconds increases time under tension without adding weight. Track each session in a simple log (date, load, sets, reps) and aim to beat one variable every week or two. Expect noticeable strength improvements within four to six weeks and visible muscle changes in the eight to twelve week window if you’re training consistently and eating enough to support recovery.
How to Integrate Hip Thrusts Into Your Lower Body Routine

Hip thrusts fit naturally into lower body training days, glute-focused sessions, or as a secondary movement after heavy compound lifts like squats or deadlifts. Placing them early in a workout when you’re fresh allows you to use the heaviest loads and cleanest form, making them a solid primary movement on glute priority days. Programming hip thrusts after squats or Romanian deadlifts capitalizes on pre-fatigue in the posterior chain and lets you finish the session with high quality glute volume without needing to lift as heavy. Either approach works. Just warm up properly with five to ten minutes of light cardio and dynamic stretches before loading the bar.
Most programs benefit from one to two hip thrust sessions per week, aiming for a total weekly volume of five to ten hard sets for the glutes (counting all hip thrust variations together). Pairing hip thrusts with exercises that emphasize different planes of motion (such as lateral lunges, step-ups, or cable pull-throughs) creates a well rounded glute stimulus and reduces the risk of repetitive strain issues. Allow at least 48 hours of recovery between heavy hip thrust sessions, especially if you’re also squatting or deadlifting in the same week, since all three movements demand significant work from the glutes and lower back. If you notice persistent soreness or form breakdown, scale back volume or intensity for one week before resuming progression.
Final Words
In the action, we walked through what a hip thrust is and how to set up: bench around knee height, chin tucked, ribs down, shins vertical at lockout, and drive through your heels. You got an 8-step setup and simple cues to lock the movement.
We flagged common mistakes and quick fixes, reviewed equipment from bands to barbells, and mapped progressions from glute bridges to single-leg variations. Programming notes covered reps, sets, and ways to progress.
Treat this as a ready-to-use plan: pick a variation, track small wins, and keep form first. A consistent hip thrust workout builds stronger glutes, steady progress, and real results.
FAQ
Q: What are hip thrusts good for?
A: Hip thrusts are good for building strong glutes, improving hip extension power, and boosting performance in lifts and athletic moves while helping reduce low‑back strain when done with solid form.
Q: What is the best exercise for osteoarthritis of the hip?
A: The best exercise for osteoarthritis of the hip depends on pain and mobility; low‑impact strengthening and range‑of‑motion work like glute bridges, swimming, or cycling are often helpful—check with a clinician first.
Q: Can you do hip thrusts with a knee injury?
A: You can often do hip thrusts with a knee injury if cleared by a clinician and pain stays low; use lighter loads, adjust foot position, or switch to glute bridges and banded versions as needed.
Q: What is the 8 8 8 rule for glutes?
A: The 8 8 8 rule for glutes refers to a time‑under‑tension approach using extended tempos—commonly eight seconds per phase—to increase muscle fatigue; coaches vary the exact pattern, so follow a specific program.