

Think bands can’t replace a full gym?
Think again.
Used right, bands give the same mechanical load as machines and free weights, with portability and variable tension that actually helps progress.
This plan shows how to train three to five days a week, hit push, pull, legs, and core, and use progressive overload (move to thicker bands, add pre‑stretch, or slow the eccentric) so you keep getting stronger.
Follow the template and you can hit gym-level strength in 30 to 45 minute sessions, no membership required.
Complete Resistance‑Band Program That Replaces Gym Workouts
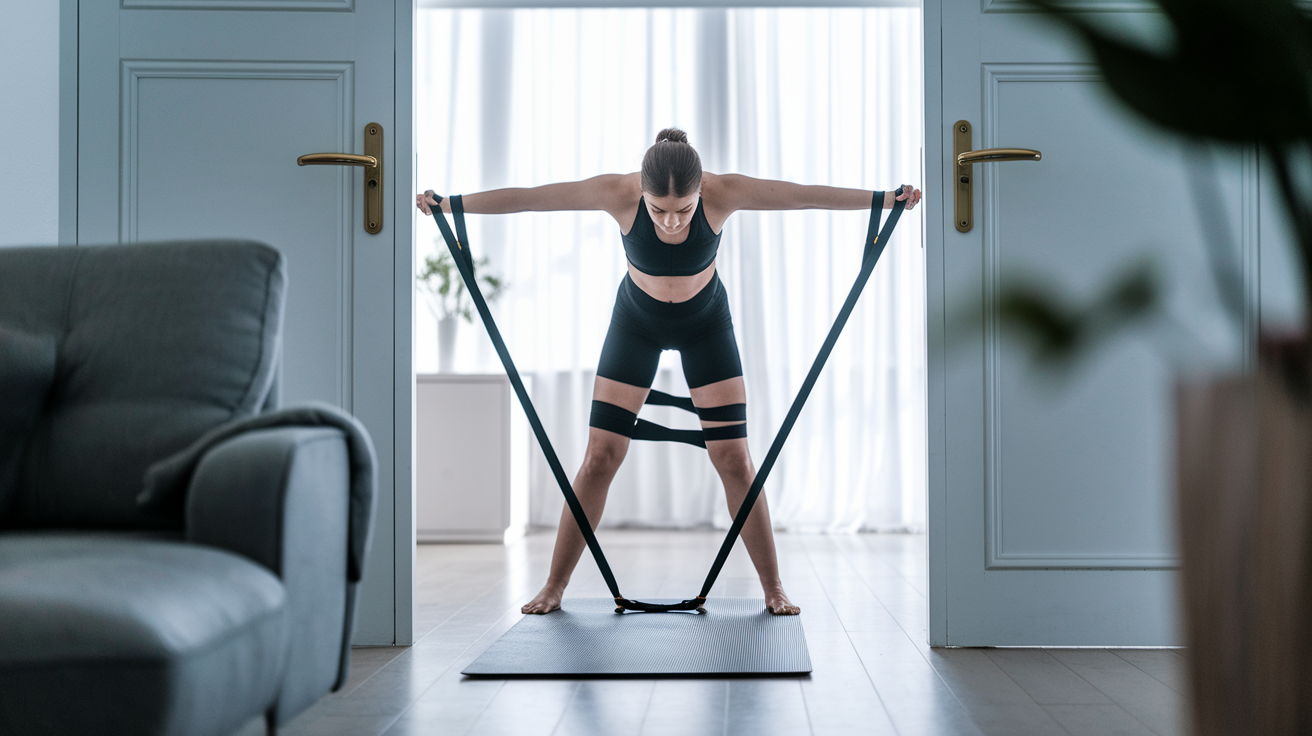
A solid resistance‑band program can replace every gym workout you need if you’re smart about progression, frequency, and exercise selection. This plan runs 3 to 5 days per week and hits all major muscle groups through controlled tension, the same mechanical stimulus you’d get from machines and free weights. The big difference? Portability and variable resistance that ramps up as the band stretches, keeping your muscles loaded through the full range.
The program covers upper‑body pushing (chest, shoulders, triceps), upper‑body pulling (back, biceps), legs (quads, hamstrings, glutes), and core stability. Most people see measurable strength gains inside the first 4 weeks when they stick to a structured plan and add resistance or reps each session. Bands give you the same training effect as barbells and cables. You just adjust tension by stepping further from the anchor or grabbing a thicker band instead of loading plates.
Each workout takes 30 to 45 minutes and follows a fixed structure that mirrors gym‑based programs. You start with movement prep, move into compound lifts that recruit multiple joints, then finish with isolation work and core. Rest between sets stays short, usually 30 to 90 seconds. Bands recover faster than heavy barbell work but still demand high effort when tension is dialed in right.
Here’s how the weekly session breaks down:
Warm‑up (5 minutes): band pull‑aparts, shoulder dislocations, bodyweight squats, and light stretches to prep joints and boost blood flow.
Upper‑body push (10 to 12 minutes): chest press, overhead shoulder press, and triceps extensions using moderate to heavy bands anchored at chest or head height.
Upper‑body pull (10 to 12 minutes): bent‑over rows, seated rows, lat pulldowns, and bicep curls with the band looped under your feet or around a post.
Legs (10 to 12 minutes): squats (band under feet, held at shoulders), Romanian deadlifts, split squats, and glute bridges with the band around your thighs or under your feet.
Core (5 minutes): band‑resisted planks, anti‑rotation presses, and standing rotations to build stability and protect your lower back.
Cool‑down (3 to 5 minutes): light static stretches and controlled breathing to bring your heart rate down and support recovery.
Essential Resistance‑Band Equipment for Gym‑Replacement Training
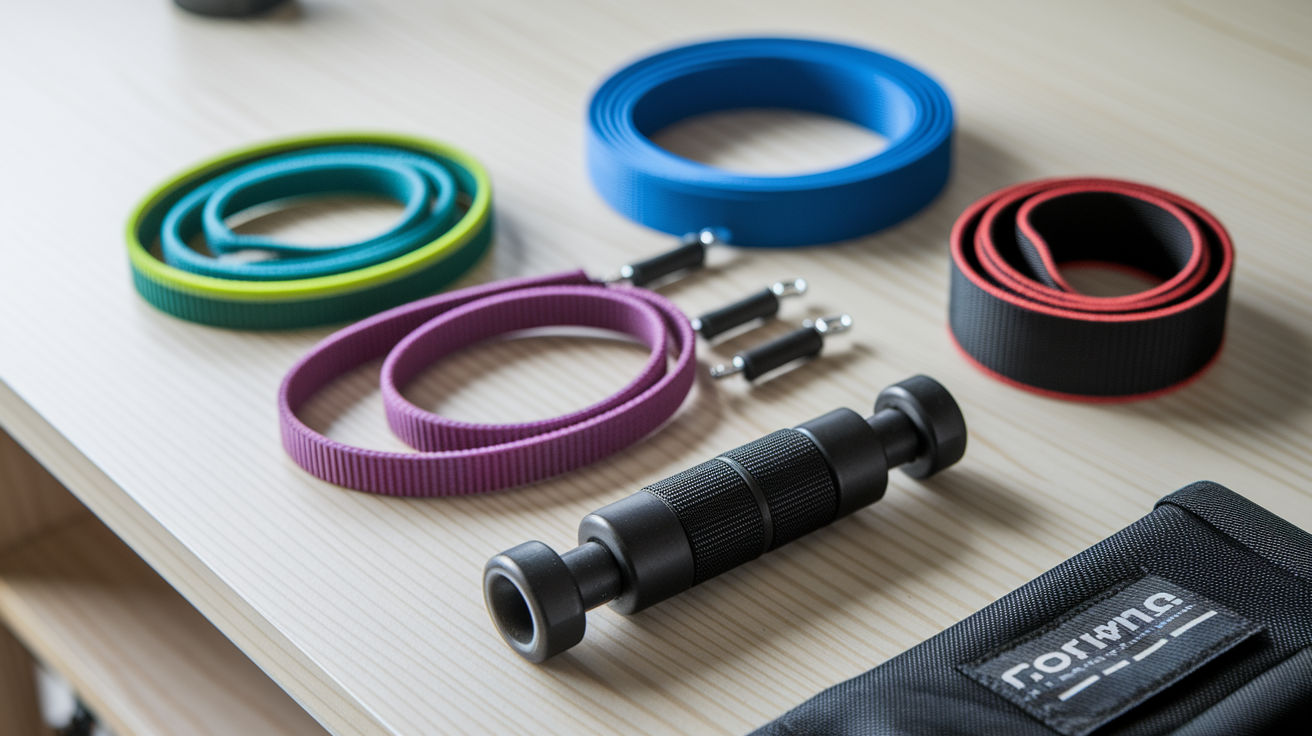
To fully replace a gym setup, you need three types of bands and one anchor system. Long‑loop resistance bands (41 inches) are the foundation. They handle heavy tension and let you step on them for squats, deadlifts, and presses. Look for bands rated in resistance ranges like 10 to 35 lbs, 25 to 65 lbs, and 50 to 125 lbs so you can match the right tension to each exercise and progression stage.
Tube bands with handles give you a more ergonomic grip for chest presses, rows, and curls. Handles let you position your wrists naturally and cut down hand fatigue during high‑rep sets. A door anchor (simple nylon strap with a foam ball) turns any solid door into a cable‑machine anchor point. This unlocks movements like lat pulldowns, triceps pushdowns, and face pulls that need a fixed high or mid‑level attachment.
Own at least four bands covering light to very heavy resistance so you can progress without plateau. Most serious programs need one light band (10 to 25 lbs) for warm‑ups and shoulder work, two medium bands (25 to 65 lbs) for upper‑body compound lifts, and one or two heavy bands (50 to 125+ lbs) for legs and back. Buying a matched set saves money and gives you consistent tension steps as you add load week to week.
Here’s what you need in your band kit:
41‑inch loop bands in four resistance levels (light, medium, heavy, extra‑heavy)
Tube band set with comfortable handles and carabiners
Door anchor for overhead and mid‑height exercises
Optional: ankle straps for leg isolations (kickbacks, abductions)
Storage bag to keep bands organized and protected from sunlight
How to Apply Progressive Overload With Resistance Bands

Progressive overload with bands works the same way as adding weight to a barbell. You make each session slightly harder than the last so your muscles adapt and grow stronger. The simplest method is moving up one band thickness when you hit the top of your rep range. If your program calls for 10 to 12 reps and you complete 12 reps with clean form for two sessions in a row, switch to the next heavier band and drop back to 10 reps.
You can also add pre‑stretch to increase starting tension. Stand further from the anchor point or shorten your grip on the band so it begins under tension before you even start the movement. This method keeps the same band but delivers more resistance across the entire range. It’s especially useful when you’re between band thicknesses and not quite ready for the next level.
Tempo manipulation is another proven overload tool. Slow down the lowering phase to three or four seconds. This increases time under tension and recruits more muscle fibers without needing a heavier band. Pair slow negatives with a one‑second pause at full stretch, then explode back to the start. That combination builds strength and control faster than rushing through reps.
Volume progression (adding one extra set or a few more reps per week) creates steady gains when load can’t increase immediately. If you performed 3 sets of 10 last week, aim for 3 sets of 11 or add a fourth set at 8 to 10 reps this week. Track every session so you know exactly what to beat next time.
Here are five reliable band progression methods:
Switch to a thicker band when you complete the top of your rep range with perfect form for two consecutive workouts.
Add pre‑stretch by stepping further away or gripping the band shorter so it starts under tension.
Slow the eccentric (lowering) phase to 3 to 4 seconds and pause for 1 second at peak stretch.
Increase weekly volume by adding one set or 1 to 2 reps per exercise each week.
Reduce rest periods by 10 to 15 seconds every two weeks to maintain intensity with the same band and reps.
Weekly Training Schedule and Periodized Programming

Most people replace gym workouts with a 3‑day or 4‑day band schedule that balances frequency, recovery, and progressive stimulus. A 3‑day full‑body plan works well if you’re new to resistance training or short on time. You train Monday, Wednesday, Friday, hitting every muscle group each session with 2 to 3 exercises per pattern (push, pull, legs, core). A 4‑day upper/lower split gives you more volume per muscle group. Upper body Monday and Thursday, lower body Tuesday and Friday, with Wednesday and the weekend for rest or light cardio.
Periodization means you change intensity and volume in planned cycles to avoid plateau and overtraining. Linear periodization starts with higher reps and lighter bands (3 sets of 15 to 20 reps) for 3 to 4 weeks to build work capacity, then moves to moderate reps and heavier bands (3 to 4 sets of 10 to 12 reps) for strength, and finishes with lower reps and maximum tension (4 to 5 sets of 6 to 8 reps) for peak strength. Undulating periodization mixes rep ranges within the same week. One session at 15 reps, the next at 8 reps. This hits different muscle fibers and keeps adaptation high.
Block‑based programs divide training into dedicated phases. A 4‑week hypertrophy block focused on volume and moderate tension, followed by a 3‑week strength block with heavier bands and lower reps, then a 1‑week deload with reduced sets and lighter bands to let your body recover fully before starting the next cycle. Deloads prevent burnout and actually improve long‑term strength because they give your joints and nervous system time to rebuild.
| Week Range | Training Intensity | Progression Notes |
|---|---|---|
| Weeks 1–4 | Moderate tension, 12–15 reps, 3 sets, 60 sec rest | Build work capacity and perfect form; add 1 to 2 reps per week or increase pre‑stretch slightly |
| Weeks 5–8 | Heavy tension, 8–10 reps, 4 sets, 90 sec rest | Switch to next thicker band; focus on controlled tempo and full range; add one set or decrease rest by 10 sec per week |
| Weeks 9–11 | Maximum tension, 6–8 reps, 4–5 sets, 2 min rest | Use heaviest band you can handle with clean form; prioritize strength over volume; slow eccentric phase to 3 to 4 seconds |
| Week 12 | Light tension, 10–12 reps, 2 sets, 60 sec rest | Deload week: reduce volume by 40 to 50%, use lighter bands, focus on mobility and recovery before next cycle |
Exercise Demonstrations for Each Muscle Group

Chest: Band Chest Press + Fly
Loop the band around a post or door anchor at chest height, hold one end in each hand, and step forward until you feel moderate tension. Stand in a split stance for stability, shoulders over wrists, and press both hands forward until your arms straighten. Lower slowly, elbows at 45 degrees to your torso, feeling the stretch across your chest. For flys, start with arms out wide and slight elbow bend, then squeeze your hands together in front of your chest like you’re hugging a tree. Keep your shoulders down and core braced so your lower back doesn’t arch.
Back: Band Row + Lat Pulldown
For bent‑over rows, stand on the center of the band, hinge at the hips with a flat back, and pull the ends toward your ribcage, squeezing your shoulder blades together at the top. Keep your neck neutral and knees slightly bent. For lat pulldowns, anchor the band overhead, kneel or stand, and pull the band down to your collarbone with elbows driving toward your hips. You should feel this in your lats (sides of your back), not your biceps. Pause for one second at the bottom, then return with control.
Shoulders: Overhead Press + Lateral Raise
Stand on the band with feet hip‑width apart, hold the ends at shoulder height, and press straight overhead until your arms lock out. Keep your ribs down and core tight so you don’t hyperextend your lower back. For lateral raises, step on the band with one foot, hold the opposite end, and lift your arm out to the side until it’s parallel to the floor. Lead with your elbow, not your hand, and keep a slight bend in your elbow. Lower slowly and repeat. You should feel tension in the side of your shoulder (middle deltoid), not your neck or traps.
Arms: Curls + Triceps Extensions
For bicep curls, stand on the band and curl both ends toward your shoulders, keeping your elbows pinned to your sides and your wrists straight. Squeeze at the top, then lower for three seconds. For overhead triceps extensions, anchor the band low behind you, hold one end overhead with your elbow pointing up, and extend your forearm until your arm is straight. Keep your elbow still. The movement comes from your triceps only. You can also do pushdowns by anchoring the band high and pressing down with straight arms.
Legs: Squats + Deadlifts
For squats, stand on the band with feet shoulder‑width apart, loop the ends over your shoulders or hold them at chest height, and squat down until your thighs are parallel to the floor. Drive through your heels and keep your knees tracking over your toes. For Romanian deadlifts, stand on the band, hold the ends with straight arms, hinge at the hips with a slight knee bend, and lower the band toward your shins. You should feel a stretch in your hamstrings and glutes, not your lower back. Stand up by squeezing your glutes forward.
Core: Band‑resisted planks + rotations
For a band plank, loop the band around your back and hold the ends under your hands in a plank position. The band adds resistance as you brace, forcing your core to work harder to stay stable. Hold for 20 to 40 seconds. For standing rotations, anchor the band at chest height, stand sideways to the anchor, and hold the band with both hands. Rotate away from the anchor, keeping your hips still and core engaged. This trains anti‑rotation strength, which protects your spine during twisting movements and builds functional core power.
Substitutions for Common Gym Machine and Free‑Weight Movements
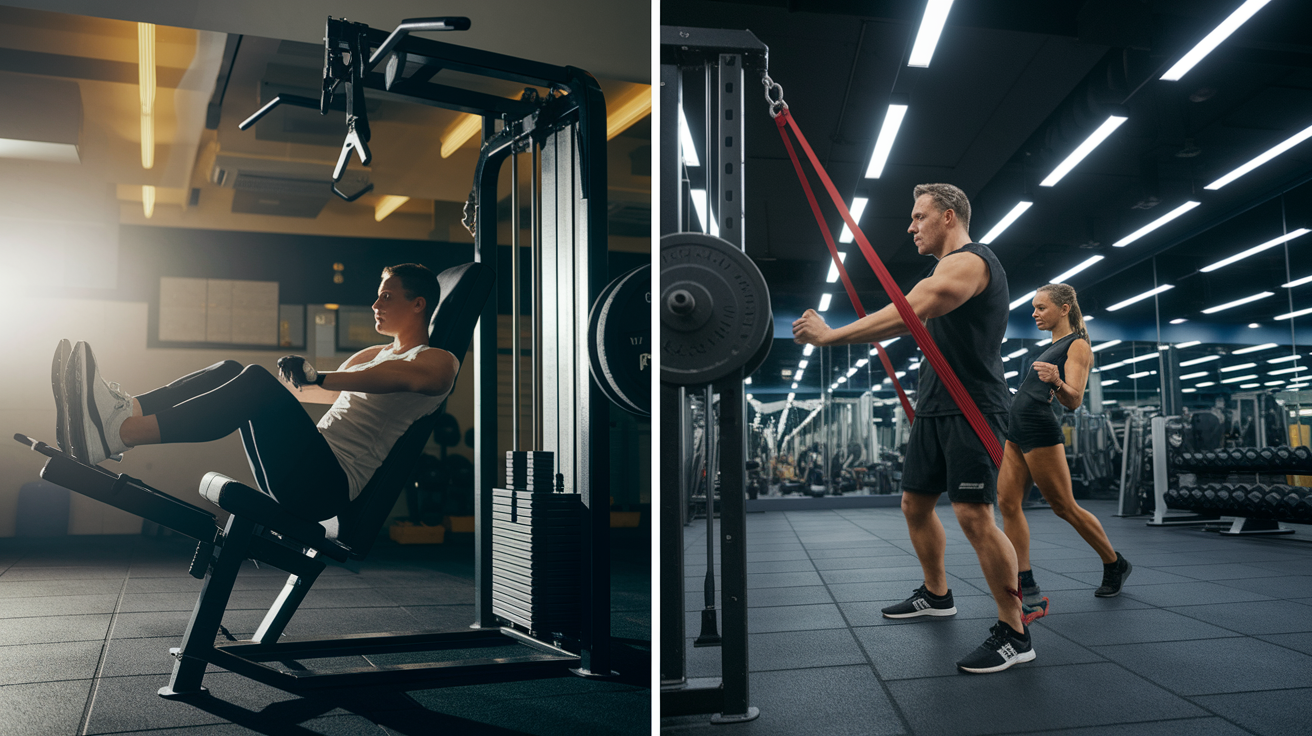
Bands can directly replace almost every machine and free‑weight exercise if you match the movement pattern and tension level. The key adjustment is anchor height and your distance from the anchor, which controls resistance curve and starting tension. Most machine exercises use a fixed pulley and stack. Bands use an anchor point and your body position to create the same pulling or pressing angle.
Free‑weight lifts like squats and deadlifts translate perfectly to bands by stepping on the loop and holding the ends at your shoulders or sides, mimicking the bar path and load position. Isolation machines such as leg curls and cable flys need slight setup changes but deliver the same muscle activation when you adjust band placement and stance.
| Gym Movement | Band Alternative | Key Adjustment |
|---|---|---|
| Barbell Back Squat | Band Back Squat | Stand on band, loop ends over shoulders; increase tension by using thicker band or doubling the band |
| Leg Press Machine | Band Leg Press (lying) | Lie on back, loop band around feet, press legs away; adjust tension by shortening band grip or stacking two bands |
| Cable Chest Press | Band Single‑Arm Chest Press | Anchor band at chest height, press forward in split stance; step further from anchor to increase starting tension |
| Lat Pulldown Machine | Band Lat Pulldown | Anchor band overhead, pull to collarbone; kneel or sit to keep torso stable and prevent using momentum |
| Dumbbell Shoulder Press | Band Overhead Press | Stand on band, press ends overhead; keep core tight and avoid arching lower back as band tension peaks at lockout |
| Seated Cable Row | Band Seated Row | Sit with legs extended, loop band around feet, pull to ribcage; sit upright with chest out to engage mid‑back fully |
How to Track Your Progress and Measure Strength Gains

Tracking band workouts means recording reps, sets, band resistance level, and rest time every session so you can prove you’re getting stronger week over week. Write down which band color or thickness you used for each exercise because “medium band” means different tension for different brands. If you completed 3 sets of 12 reps with a red band last Monday and hit 3 sets of 14 reps with the same band this Monday, that’s measurable progress.
Use a simple notebook or phone app with columns for date, exercise, band level, sets, reps, and notes about form or fatigue. Over four weeks you should see reps climb, rest periods shrink, or band thickness increase for at least two exercises per muscle group. If none of those metrics move, you’re not applying enough progressive overload and need to adjust your plan.
Form improvements count as progress too. If your squat depth increases by two inches or your row technique gets cleaner (no lower‑back rounding, better shoulder‑blade squeeze), that’s a real gain even if reps stay the same. Take a short video every two weeks to compare your range of motion and posture. Small technique wins lead to bigger strength jumps later.
Here are four key metrics to track every workout:
Reps completed per set with notes on whether the last rep was hard or easy (use RPE 1 to 10 scale, where 8 means you had about 2 reps left in the tank).
Band resistance level for each exercise (write the color, thickness, or pound rating so you know exactly when you stepped up).
Rest time between sets (start at 90 seconds, aim to reduce to 60 seconds over 3 to 4 weeks while keeping reps steady).
Weekly volume total (multiply sets × reps × band level for one exercise, then compare week over week; a 10% increase per week is solid progress).
Final Words
In the action, you now have a complete, step‑by‑step resistance‑band program: which bands to buy, how to progress tension, a weekly schedule, exercise demos, gym substitutions, and simple tracking tips.
Follow the session order, apply progressive overload with bands, and log reps or tension. Keep form first; tweak bands or reps before adding volume.
Use this progressive resistance band plan to replace gym workouts across 3–5 sessions a week, trust small, steady progress, and enjoy getting stronger.
FAQ
Q: Can resistance bands fully replace gym workouts?
A: Resistance bands can fully replace gym workouts when you use structured progression, train all major muscles with controlled tension, and track load using band thickness, reps, tempo, and range of motion.
Q: How many sessions per week and how should each session be structured?
A: Aim for 3–5 full-body sessions per week, each with a warm-up, upper push, upper pull, legs, core, then a cool-down—short, focused work that hits every major muscle each visit.
Q: Which resistance bands and accessories are essential to replace gym equipment?
A: Essential gear includes heavy loop bands for strength, tube bands with handles for presses and pulls, long bands for compound lifts, plus a door anchor and anchor points for variety.
Q: How do I apply progressive overload with resistance bands?
A: Apply progressive overload by increasing band thickness, adding pre-stretch, changing tempo, raising volume or reps, and altering range of motion or mechanical advantage for harder tension.
Q: How should I periodize my band training over weeks?
A: Periodize with 4–6 week blocks using linear, undulating, or block progressions, alternate intensity and volume across weeks, and schedule regular recovery days for strength gains.
Q: What are good band exercises for each major muscle group?
A: Good band choices: chest press and fly, rows and lat pulldown, overhead press and lateral raise, curls and triceps extensions, squats and deadlifts, plus band-resisted planks and rotations.
Q: What band substitutes work for common gym machines and free-weight moves?
A: Bands substitute gym machines and free weights by matching movement patterns: anchored bands for leg press, chest press, cable row, and band variations of squats, deadlifts, and presses with minor setup tweaks.
Q: How should I track progress and measure strength gains with bands?
A: Track progress by logging reps, sets, band tension (color or thickness), reduced rest, tempo improvements, and cleaner form—use weekly metrics to guide small, testable increases.
Q: What safety tips and common mistakes should I watch for with band training?
A: Prioritize secure anchors, controlled tempo, full tension through the range, good posture, and gradual progression; avoid jerky movements or snapped bands and breathe through every rep.